Automatic-Surface-finishing-FAQS
In this Article, Kingstone Robotics will answer over 30 common questions about robotic surface finishing, including technical fundamentals, system selection, application use cases, benefits (ROI), safety, and quality control. The aim is to provide professional, insightful explanations of the core principles, mechanisms, distinctions, and use cases for robotic polishing, grinding, and deburring (among other finishing processes). Each question below is answered with clear explanations, underlying principles, and key industry knowledge, often supported by research and real-world data.
1. Technical Understanding (Basics)
This section covers the basic technical concepts of robotic surface finishing. We explain what surface finishing entails, how robots perform tasks like polishing, grinding, and deburring, and the differences between these processes. We also discuss the types of robots and tools used, as well as important principles like force control and consistency in robotic finishing.
What is robotic surface finishing and why is it important?
Robotic surface finishing refers to using automated robotic systems (typically multi-axis robotic arms) to perform surface treatment processes such as polishing, grinding, sanding, buffing, and deburring on workpieces. The goal of surface finishing is to improve a part’s surface characteristics – for example, achieving a smoother texture, removing rough edges or burrs, attaining a specific gloss, or preparing the part for painting or coating . In manufacturing, proper surface finishing is crucial both for functional reasons (e.g., reducing roughness to improve performance, fit, or wear resistance) and for aesthetic reasons (achieving a desirable appearance or shine). Traditionally, these tasks have been done manually, but robots are increasingly used to automate them for higher consistency, speed, and safety.
Robotic surface finishing systems typically consist of an industrial robot arm equipped with appropriate abrasive tools (such as grinding wheels, sanding discs, polishing buffs, or brushes) and often additional devices like force/torque sensors or compliance units. The robot is programmed to follow a path over the workpiece’s surface while applying the correct amount of force and speed. This automation enables very consistent finishes – each part is processed with the same motions and pressure, reducing variability . It also addresses labor challenges: finishing work is repetitive, skill-dependent, and can be dirty, dull, and dangerous (“3D” jobs). By using robots, manufacturers can improve operator safety and alleviate the difficulty of finding skilled workers for these tasks . In short, robotic surface finishing is important because it delivers uniform quality, higher productivity, and safer working conditions compared to manual finishing.
How do polishing, grinding, buffing, and deburring differ from each other?
Surface finishing includes several distinct processes – grinding, polishing, buffing, and deburring are common ones. Each serves a different purpose and involves different levels of material removal:
-
Grinding: A cutting/material removal process using abrasive tools (like grinding wheels or belts) to aggressively remove material. It is used to shape parts, remove welds or imperfections, or achieve required dimensions. Grinding leaves a relatively coarse finish and is often a preparatory step before finer finishing . For example, grinding might take off a mill scale or flatten a weld seam.
-
Polishing: A finishing process using abrasives (e.g. sanding discs, abrasive wheels, or pads) to refine the surface, smooth it, and improve its roughness. Polishing is less aggressive than grinding – it removes smaller amounts of material to eliminate scratches from prior steps and produce a smoother, matte or semi-gloss surface . It aims for functional smoothness and often precedes buffing.
-
Buffing: A final finishing process using a soft wheel (cloth or sisal) and polishing compound to produce a high-gloss, shiny surface. Buffing is very light in material removal – it mainly burnishes and cleans the surface for appearance . Polishing and buffing are often confused, but polishing is more aggressive (for smoothness) whereas buffing is for ultimate shine or luster.
-
Deburring: A process focused specifically on removing burrs – small sharp edges, splinters, or protrusions that remain on a workpiece after cutting, machining, or casting. Deburring is usually very localized and minimal in material removal; it uses tools like small grinding bits, files, brushes, or specialized deburring cutters to smooth out those rough edges for safety and proper assembly . Unlike polishing, deburring isn’t about overall surface smoothness or shine, but rather about cleaning up edges and ensuring no sharp burrs remain .
Below is a summary comparison of these processes:
| Process | Primary Purpose | Material Removal Level | Typical Tools Used |
|---|---|---|---|
| Grinding | Heavy stock removal; shape or level surfaces (e.g. remove welds, excess material) | High/aggressive – removes noticeable material to alter shape or size | Rigid grinding wheels, abrasive belts, grinding discs (coarse grit) |
| Polishing | Refining surface smoothness; preparing for final finish (reduce roughness, minor scratches) | Moderate – removes fine scratches or small amounts to smooth surface | Sanding discs, flap wheels, abrasive pads (medium to fine grit) |
| Buffing | Creating high gloss and clarity in surface (aesthetic finishing) | Minimal – mainly burnishes surface, very slight removal with compound | Cloth or fiber buffing wheels with polishing compounds (very fine abrasive) |
| Deburring | Removing burrs and sharp edges from features (holes, edges) after machining or cutting | Minimal – targets tiny protrusions or edges only | Small grinding points, rotary burr tools, wire brushes, files, or specialty deburring tools |
As shown above, grinding is the most aggressive, polishing is intermediate, buffing is for final shine, and deburring is a targeted cleanup process. In practice, a workpiece might go through multiple stages – for instance, an initial grinding to remove bulk imperfections, then polishing to smooth, and finally buffing for shine (common in metal fabrication of decorative parts). Not every process is always needed; it depends on the part requirements. Understanding these distinctions helps in selecting the right robotic process or tool for a given finishing task.
How does a robot perform polishing or grinding compared to a human operator?
A robot performs polishing, grinding, and similar finishing tasks by mimicking the motions and applying forces much like a skilled human would – but with programmed precision and endurance. A typical robotic finishing cell includes an industrial robotic arm (usually with six axes of motion for flexibility) to which a finishing tool is attached (grinder, sander, polishing wheel, etc.). The robot is programmed with a path that moves the tool across the part’s surface at the correct angles and speeds. Additionally, force control is crucial: the robot system monitors or regulates the contact force so that the tool presses against the part with a consistent pressure . This emulates the “feel” a human operator uses to achieve uniform results.
The key differences from a human are consistency and stamina. Robots don’t get tired – they can apply the same force and follow the exact same path cycle after cycle, hour after hour . Human polishers often suffer fatigue, causing pressure variations and missed spots over time. A robot, by contrast, maintains a steady process, leading to very uniform finishes across all parts. For example, Kingstone’s robotic polishing systems are programmed to maintain consistent tool trajectories and pressure, effectively reducing variability due to human fatigue .
Another difference is that robots can integrate sensor feedback to adjust on the fly. Many robotic finishing systems use force/torque sensors or active compliance devices on the tool. These sensors let the robot “feel” the surface – if, say, the part’s position varies slightly or the surface isn’t perfectly flat, the sensor feedback can instruct the robot to compensate (adjust position or force) to stay consistent . This is analogous to how a skilled human might sense and adjust hand pressure. Such feedback loops ensure even complex or uneven surfaces are polished uniformly without gouging or under-processing areas.
Programming a robotic finishing operation involves teaching or computing the path that covers the entire surface evenly. Advanced off-line programming software can generate tool paths for complex geometries, and CAD models can be used to simulate contact points. In some cells, vision systems scan the part to guide the robot or to detect where extra polishing is needed. For example, an AI vision system might detect a scratch and direct the robot to spend more time there – something a human does by eye. With these technologies, robots are capable of replicating and even enhancing the techniques of human operators, delivering consistent results at greater speed. In summary, a robot polishes or grinds by combining precise motion control, consistent force application, and sensor-based adjustments, achieving results equal to or better than manual methods in many cases.
What types of robots are used for surface finishing tasks?
The majority of robotic surface finishing applications use 6-axis articulated robots – the typical robotic arms seen in industrial settings – because they offer the flexibility and range of motion needed to cover complex part surfaces. A six-axis robot can orient a tool in any direction and follow curved or angled surfaces, which is essential for polishing or grinding intricate shapes. These robots come in various sizes and payload capacities; one must choose a model that can handle the weight of the tool and apply the required force over the workpiece area . For heavy grinding tools or large parts, a higher-payload robot with sufficient reach is selected . For example, if polishing a large aluminum casting, you might need a big robot arm to reach across it and press a grinding head firmly.
Other types of robots and automation are also used in some scenarios:
-
Cartesian/Gantry Robots: These move in linear X-Y-Z axes (and sometimes have a wrist for orientation). They are used for large flat surface sanding or grinding, such as sanding large panels, because they can span wide areas efficiently . Gantry systems are common in woodworking (for sanding doors or furniture pieces) and some large-scale metal polishing (like large sheets).
-
SCARA Robots: SCARA (Selective Compliance Articulated Robot Arm) robots have 4 axes and are known for fast, planar movements. They are less common in surface finishing but can be used for simple polishing tasks on smaller parts or assemblies that require quick, repetitive motions on a plane . Their limited range (typically only around horizontal planes) makes them suitable for specific tasks like polishing small components or PCBs.
-
Collaborative Robots (Cobots): Cobots are robots designed to work alongside humans safely, often with force-limited joints and simpler programming. They can be used for light-duty finishing jobs – for instance, light polishing, sanding, or buffing tasks on small parts. Cobots like Universal Robots arms have built-in force modes and are indeed marketed for polishing applications that require a delicate touch . The advantage of cobots is easier deployment and safety (they can often operate without full fencing if risk-assessed properly). However, their disadvantage is limited payload and speed – heavy grinding or large abrasive tools may be beyond their capability, and the presence of flying debris or sparks still often necessitates enclosures and protective measures even if the robot is “collaborative.” In practice, cobots are great for low-force, precision polishing tasks (e.g. buffing plastic or wood parts, or polishing a part that requires a light touch) .
-
Specialized CNC Finishing Machines: In addition to multi-axis robots, there are CNC machines specifically built for polishing or grinding (for example, a 4-axis polishing machine with built-in spindles). Kingstone Robotics, for instance, offers a CNC polishing machine as an alternative to a robotic arm . These are essentially machine tools dedicated to surface finishing – they may offer very high rigidity and built-in process heads for certain applications (like mirror polishing molds, or mass polishing of identical parts). The trade-off is that they are less flexible than a reprogrammable robot arm. We’ll discuss choosing between these options later.
In summary, most surface finishing tasks use a 6-axis industrial robot for flexibility. However, the “right” robot depends on the job – factors like part size, required force, precision, and integration needs determine whether a larger articulated robot, a gantry, a cobot, or a dedicated machine is optimal . It’s crucial to assess reach, payload, and safety needs when selecting the robot type for finishing applications.
What key components make up a robotic finishing system?
A robotic finishing system is more than just a robot arm. It typically includes several integrated components working together:
-
Industrial Robot Arm: The programmable robot manipulator provides the motion. As discussed, usually a 6-axis arm is used for its range and flexibility. The robot must have sufficient reach and payload for the parts and tools involved.
-
End-of-Arm Tooling (EOAT): This is the business end that actually performs the finishing. Depending on the process, EOAT could be an abrasive grinding head, an orbital sander, a rotary buffer/polishing wheel, a belt grinder attachment, a deburring tool, etc. Often these tools have an integrated electric or pneumatic motor to spin a sanding disc or polishing wheel. For example, a robotic polishing EOAT might be a motor-driven spindle holding a buffing wheel. Specialized tools (like compliant sanders or belt sanders) can be attached as needed.
-
Compliance/Force Control Device: Because maintaining proper contact is so important, many systems include an active compliance device or force-torque sensor at the wrist. An Active Compliance device (such as FerRobotics’ Active Contact Flange) acts like a smart spring, ensuring the tool maintains a set pressure against the surface . Alternatively, a force/torque sensor can feed data to the robot’s controller to actively modulate force. These components allow the system to “float” the tool to accommodate part irregularities, achieving consistent force and preventing tool or part damage.
-
Fixture or Part Holding System: In many cells, the workpiece is fixed in a positioner or fixture so the robot can reach it from all required angles. Alternatively, the robot might hold the part and move it against a stationary tool (this configuration is also used). In either case, some method of securing or presenting the part to the robot is needed. For heavy or complex parts, a programmable robotic positioner (like a rotating table or multi-axis positioner) may be used to reorient the part, giving the robot better access for 360° finishing.
-
Safety Enclosures and Dust Collection: Finishing processes can produce a lot of debris (metal filings, dust) and sometimes sparks. A complete system often includes a safety enclosure or cell fencing to keep humans out during operation and contain debris. Additionally, a dust extraction or vacuum system is important to remove abrasive dust and maintain both cleanliness and operator safety . For example, a robotic sanding station might have a vacuum hood near the tool to capture dust as it’s generated, which also keeps the abrasive from clogging. Kingstone’s systems often incorporate dustproof enclosures or dust collection options for this reason.
-
Robot Controller and Software: The robot is driven by its control unit and software. Programming software (either vendor-specific or third-party offline programming tools) is used to create the tool paths and process parameters. For finishing, the software might allow setting speeds, forces, and tool paths, sometimes with features like path teaching by demonstration (hand-guiding a cobot, for instance, to trace a path, which the software records) .
-
Abrasives/Consumables: Though not “components” in a mechanical sense, the abrasive media (grinding wheels, sanding belts, polishing compounds, buffing pads, etc.) are a critical part of the system. They must be chosen correctly for the material and finish required. Often, robotic cells include media change stations or tool changers if multiple grits are needed in sequence. Ensuring a supply of fresh abrasives and changing them at proper intervals is part of the system’s operation (some advanced cells can automatically swap a worn belt for a new one).
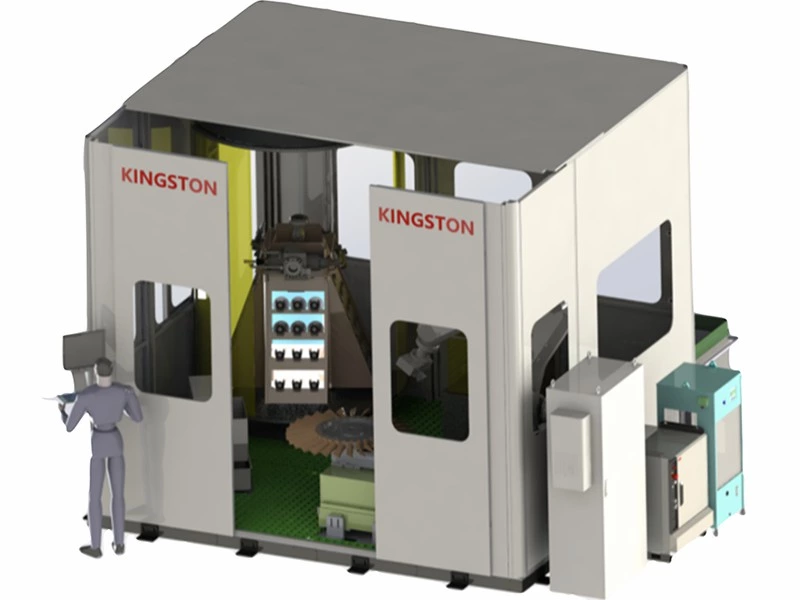
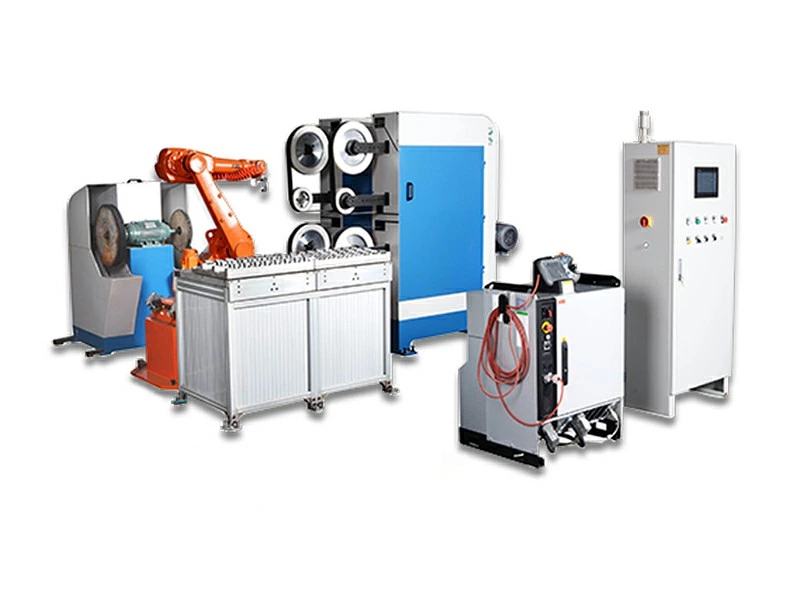
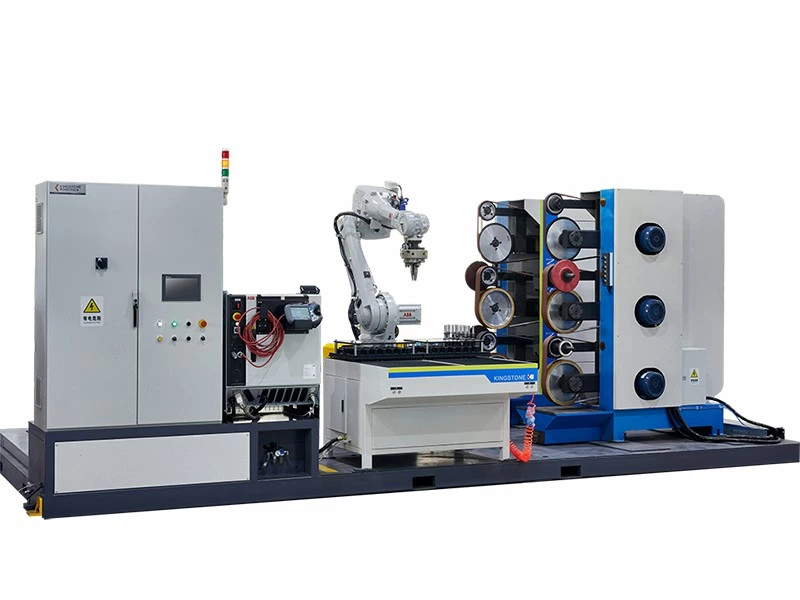
To illustrate, consider a robotic buffing unit: it might consist of a 6-axis robot on a base, with an active force-controlled buffing wheel tool on its wrist. The part (say an automotive trim piece) is mounted on a fixture or turntable. The cell is enclosed with a safety interlock door, and a dust extraction system is plumbed to the buffing wheel to suck up lint and compound dust. The robot’s controller is programmed with the path to move the buffing wheel across the trim piece’s surface uniformly. This entire setup – robot, tool, fixture, enclosure, vacuum, controller – constitutes the robotic finishing system. Kingstone Robotics delivers such turnkey systems, ensuring that all these components work seamlessly together .
Why is force control or compliance so important in robotic surface finishing?
Maintaining the correct and constant force between the tool and the workpiece is essential for achieving a high-quality, uniform finish. If the robot pushes too hard or too lightly, the outcome can be suboptimal: excessive force can gouge or remove too much material and wear out abrasives faster, while too little force might mean insufficient material removal or no polishing action. In manual finishing, skilled workers continuously adjust pressure by feel. For robots, force control or compliance devices fill this role.
Force control ensures consistency. A well-tuned robotic system applies the same target force over every area of the part, leading to a very even finish. For example, an active compliance tool can keep a sanding disc pressed at 50 N of force throughout the operation – resulting in uniform roughness. If a part’s surface has slight variations or is not perfectly flat, a compliant tool will move in/out to maintain that force . This avoids situations where a rigid robot might otherwise press harder on a raised spot and lighter on a low spot, which would cause uneven polishing. As FerRobotics (a leader in active compliance technology) notes, having reliable force control is key to achieving optimum surface quality in automated finishing . In fact, with precise force control, some robotic systems attain such consistent results that no manual rework or touch-up is needed afterward .
Force control also improves process efficiency and tool life. When force is kept in the ideal range, abrasive media perform better and last longer. If a robot pushes a grinding wheel too hard, it can “glaze” the abrasive (prematurely dulling it) or overload the motor. Too light and the process is inefficient. An actively controlled constant contact force avoids these extremes, thereby extending abrasive life. One source notes that constant optimal force can increase abrasive life by 200–300% compared to manual processes, because the media isn’t being under- or over-loaded by human variability . Additionally, consistent force means predictable material removal rates, which simplifies programming and quality control.
For example, in a robotic deburring operation on cast metal parts, there may be small variances in burr size. A force-controlled deburring tool will automatically adjust to remove the burr without cutting too deep into the part – this yields clean edges without damage. In polishing of curved surfaces, compliance allows the tool to traverse the curvature while maintaining polish pressure, resulting in an even gloss.
In short, force control/compliance is crucial because it gives the robot a “sense of touch” – ensuring safety (no excessive forces that could break a tool or part), ensuring quality (consistent finish), and ensuring efficiency (optimal use of abrasives and steady process). Kingstone’s robotic solutions, for instance, integrate advanced motion control and sensing to maintain consistent polishing pressure, which both protects the part and guarantees uniform results . This underlying principle is one of the reasons modern robotic finishing can now match and exceed human craftsmen in quality consistency.
Can robotic polishing achieve the same quality finish as manual polishing by an expert?
In many cases, yes – a properly implemented robotic polishing system can equal or even surpass the finish quality achieved by skilled human operators, especially in consistency across multiple parts. Early in the adoption of automation, there was a perception that high-end finishing was a “black art” requiring the unique touch of a few craftsmen . However, advances in robotics and sensor technology have changed this view. Industry experts now affirm that virtually any polishing, grinding, or finishing application can be automated to the necessary quality level .
Robots bring two key advantages to quality: consistency and precision. A human polisher might produce one perfect piece, but over a shift their work can vary due to fatigue or slight changes in technique. A robot will produce part #100 exactly the same as part #1 in terms of surface finish, assuming the program and setup are correct. This consistency often reduces scrap and rework because there are fewer out-of-spec variations . For example, in the automotive industry, where dozens of body panels might need identical polishing, robots ensure uniform appearance panel-to-panel .
In terms of absolute quality (roughness achieved, gloss, etc.), robots are fully capable of meeting high standards. They can apply very fine abrasives and compounds with controlled movements far smaller than human hand tremors. They can polish in micro-motions repeatedly to achieve mirror finishes. A case in point: some aerospace components like turbine blades require mirror-like finishes for performance; robotic polishing cells have been developed to meet these strict Ra (roughness average) requirements that only master craftsmen could achieve before. FerRobotics reported that their automated sanding of plastic parts yielded such outstanding consistency that no manual reworking was necessary, indicating the robot achieved top quality on its own .
That said, achieving this performance requires proper setup and programming. The right combination of tools, abrasives, force control, and path strategy is needed. When those are in place, robots eliminate the minute inconsistencies of human work. There are even examples where robots enable better finishes by using techniques humans cannot – for instance, using larger or heavier polishing media than a person could handle, or running an abrasive at an optimal constant speed and pressure that a human could not sustain. A 3M case study noted that by moving to a robotic system, a manufacturer was able to use a much larger grinding disk (24-inch diamond) that a human could never safely use, resulting in reduced heat and distortion and an overall better outcome .
In summary, an expert human might produce one beautifully polished part, but a robot can produce a thousand parts all polished to that same beautiful standard. With today’s technology, including advanced vision and feedback, robotic finishing absolutely can match expert-level quality. The key is leveraging the robot’s strengths – consistency, endurance, precision – and compensating for its lack of innate judgment by adding sensors and smart programming. When done right, the results speak for themselves: high-gloss, uniformly finished products with minimal defects, achieved with robotic automation.
What materials can be polished, ground, or deburred using robots?
Robotic surface finishing is applied to a wide variety of materials across many industries . The most common materials are metals, but robots can also finish plastics, composites, and even wood in some cases. Here are examples by material category:
-
Metals: This is the largest category. Robots grind, sand, and polish steels (mild steel, stainless steel), aluminum and its alloys, titanium, brass, copper, etc. For instance, in aerospace, robots polish high-strength titanium or nickel alloy turbine blades; in automotive, robots grind welds on steel car bodies or polish aluminum wheels. Cast iron and cast aluminum parts are often robotically deburred or ground to remove casting flash. Different abrasives are chosen based on metal hardness (e.g., diamond or ceramic abrasives for hard alloys, alumina or silicon carbide for softer metals).
-
Plastics and Polymers: Robots can trim and deburr plastic parts (like injection-molded components). They also sand and polish plastics for cosmetic finishes – for example, polishing acrylic or polycarbonate to a clear shine, or buffing scratches out of plastic headlight lenses. Because plastics can be softer and heat-sensitive, the robot’s speed and force must be carefully controlled to avoid melting or gouging. Active compliance is useful here to gently finish plastic surfaces.
-
Composites and Fiberglass: Many composite parts (such as carbon fiber panels or fiberglass components) require edge trimming and surface finishing. Robots are used to sand composite edges, drill and countersink holes smoothly, or grind off excess resin. Finishing composites can produce harmful dust (carbon or glass fibers), so using robots with proper dust extraction is a big safety benefit. For example, in wind turbine blade manufacturing (often fiberglass), robots sand the blades to shape and smooth them.
-
Wood: Automated sanding of wood products is also common (though often done with specialized sanding machines or gantry robots). Collaborative robots have even been used for tasks like sanding furniture or musical instruments, where a light touch is needed. Wood sanding robots handle repetitive grit sequences to prepare furniture components for finishing, improving consistency in what used to be very manual labor.
-
Ceramics/Glass: While more niche, there are robotic systems for polishing glass or ceramic surfaces using abrasives or even grinding/polishing optical surfaces. For instance, robotic polishing can be used on glass mirrors or lenses with special abrasive heads. Ceramics like dental implants or artificial joints (often made of ceramic materials) can be polished robotically to a smooth finish as well.
In essence, if a material can be finished by an abrasive or cutting tool, a robot can likely be employed to do it. The robot itself is material-agnostic – it’s the tooling and parameters that change. One must pick appropriate abrasive media (e.g., softer abrasives for softer materials to avoid aggressive cutting, or coolant for metals to avoid overheating). The industry experience shows that robots have successfully been used on everything from grinding concrete surfaces to buffing brass doorknobs.
In fact, numerous industries now use robotic finishing specifically because they deal with tough materials or hazardous dust that make manual work difficult. As an example, aerospace companies use robots to polish thermal spray coatings (very hard ceramics) on engine parts, which would wear out a human quickly. The adaptability of robots with different tools means they can be equipped to handle the unique challenges of each material. Manufacturers just need to adjust speed, force, and abrasive type accordingly.
2. System and Equipment Selection (Buying Decisions)
In this section, we address questions about choosing and configuring robotic surface finishing systems. These include considerations for selecting the right robot and tools, deciding between different system types (like a robotic arm vs. a CNC polishing machine, or industrial robot vs. collaborative robot), and other procurement decisions. We also cover what additional equipment is needed (like enclosures, dust collectors) and how to ensure the system fits the production requirements.
What factors should be considered when selecting a robotic surface finishing system?
Choosing a robotic finishing system is a significant investment, so several key factors must be evaluated to ensure the system meets your needs:
-
Part Characteristics: Consider the size, shape, material, and weight of the parts you need to finish. The robot must have sufficient reach to cover the entire surface and enough payload to handle any heavy tools (or to pick up the part if the robot will manipulate the workpiece) . Complex shapes may require a robot with advanced kinematics or even a force-sensing capability to follow contours. Very large parts might require a gantry or rail system for the robot to extend its workspace. Material matters too – e.g., finishing hard metals might need more robust spindles and abrasives than polishing plastic.
-
Process Requirements: Determine what finishing processes are needed (grinding, sanding, polishing, deburring, buffing) and the level of finish required (e.g., surface roughness target or cosmetic appearance). Different processes may necessitate different tools and even different robot types. For instance, heavy grinding of welds produces forceful reactions on the robot, so a sturdier robot and tool (with possibly active force control) will be required. If multiple steps are needed (say grinding then polishing), you might need a tool changer or multiple robots/cells in sequence.
-
Volume and Throughput: The production volume and takt time are crucial. If you need to finish 100 parts a day, the robot cycle time per part must accommodate that. High volume favors more automation and possibly multiple robotic stations working in parallel. Conversely, low-volume/high-mix production might need a more flexible cell that can be quickly reprogrammed for different parts. Ensure the system’s speed aligns with ROI goals – sometimes investing in a more capable (faster) robot or additional tooling can pay off in throughput.
-
Robot Size and Type: Based on the above, select an appropriate robot model. Key specs are payload, reach, repeatability, and speed. Grinding and polishing typically need a six-axis robot for flexibility. The payload must handle the tool weight plus the force – for example, if pressing with 20 kg of force using an angle grinder, the robot’s wrist and payload should accommodate that continuous load . Repeatability (precision) is important if the finishing tolerances are tight (some polished parts might need very even material removal). In some cases, a collaborative robot might be considered if the application is light-duty and you want ease of programming or to avoid large safety fences. But remember that collaborative robots generally have lower payloads and slower speeds for safety, so they might not meet throughput for heavy tasks.
-
End-of-Arm Tooling and Abrasives: The choice of finishing tool is a major factor. Options include belt grinders, orbital sanders, die grinders, polishing spindles, etc. For each, consider availability of robotic-compatible versions (with mounting flanges, automated controls). Some vendors specialize in robotic compliant tools (PushCorp, ATI, FerRobotics, etc.) which are often recommended because they integrate force control or compliance. The abrasives (discs, belts, compounds) should be industrial grade for automation – consistent quality abrasives ensure consistent results. Factor in how you will supply and change consumables (maybe an automatic belt changer or a simple quick-change mechanism for an operator between shifts).
-
Integration and Footprint: Assess your facility and how the cell will integrate. Do you have floor space for the robot cell, including safety fencing and perhaps a loading/unloading station? How will parts get in and out – manually by an operator, or via conveyor, or by another robot? If your shop isn’t arranged for automation, you might need to allocate space and consider material flow around the cell (e.g., adding a conveyor or buffer for parts) . Integration also includes the control systems – will the robot be standalone or connected to a factory PLC/MES system? Ensure compatibility with your control architecture if needed.
-
Safety and Environmental Controls: Determine what safety measures are needed (almost always, a physical barrier or safety scanner system for an industrial finishing robot, due to flying debris). Also consider dust or fume extraction requirements, especially if grinding metals (which create fine dust) or polishing with compounds (which fling particles). A dust collection unit or vacuum integrated with the tool may be necessary . Noise is another factor – grinding can be loud, so an enclosure that also dampens noise might be beneficial for the work environment.
-
Cost and ROI: Of course, budget constraints will influence the selection. Beyond the robot itself, account for the cost of the entire system: tooling, integration engineering, safety equipment, installation, and training. Often, it’s wise to work with an experienced system integrator (like Kingstone Robotics or partners) who can deliver a turnkey solution and help estimate ROI. Consider the operational costs too (consumables, maintenance, power consumption). We will discuss ROI in detail in the Benefits section, but it should be part of the selection criteria – ensure the solution you choose is justified by the labor savings, quality gains, and throughput improvements it provides.
-
Vendor/Supplier Support: Lastly, consider the support and experience of the supplier. Finishing automation has nuances, so a provider with a track record in grinding/polishing automation can greatly help. They may offer process development services (e.g., sample finishing of your parts to prove the concept) and better training for your staff.
By weighing all these factors – part and process needs, robot/tool specs, integration and cost – you can choose a robotic finishing system that is well-matched to your manufacturing requirements. It often involves trade-offs: for example, a bigger robot might handle a wider range of parts but cost more; a smaller one is cheaper but might limit future uses. The selection phase is critical, and typically involves cross-functional input (production engineers, operators, safety managers, and finance) to make the best decision.
Should I use an industrial robot or a collaborative robot (cobot) for surface finishing tasks?
This decision depends on the specifics of your application, as industrial robots and collaborative robots have different strengths. Here’s a breakdown of considerations:
Industrial Robots (Standard 6-axis robots): These are the traditional robots which are fast, powerful, and typically require fenced workcells for safety. They are well-suited for surface finishing tasks that involve heavy tools, high forces, or large parts. Advantages of industrial robots include:
-
Higher Payload and Speed: Industrial models can handle heavier abrasive tools (grinders, large polishers) and press with significant force. They also operate at higher speeds, which can translate to shorter cycle times. For example, an industrial robot might aggressively grind a weld seam in seconds, whereas a cobot (which often has force/speed limits) might take longer.
-
More Rigidity: They tend to be more rigid, which is beneficial for maintaining precision under load. For heavy grinding, rigidity helps in controlling the process.
-
Proven Integration with Peripheral Equipment: Industrial robots easily integrate with things like tool changers, automated part feeders, and safety PLCs. They often have a wide array of compatible end-of-arm tools from various vendors.
-
No Force Limits (Beyond Programming): Unlike cobots, which have built-in force limits to stop when encountering an obstruction, industrial robots will push as commanded. This is necessary when you want the robot to exert a strong force (for example, to grind down a tough material). You rely on sensors or programming to manage that force rather than the innate robot design.
However, industrial robots must be operated in a safeguarded space – meaning fencing, interlocks, or area scanners are needed to keep people away during operation. They also typically require more specialized programming knowledge (though modern programming is getting easier).
Collaborative Robots (Cobots): Cobots are designed to share workspace with humans and have safety features like force limiting – they will detect collisions and either stop or safely slow. They can often be hand-guided in teaching mode, which simplifies programming for non-experts. In surface finishing, cobots are increasingly used for tasks like sanding, light polishing, and buffing, especially in environments like small shops or where the robot might work right next to humans. Some points in favor of cobots:
-
Ease of Deployment: Cobots generally have more intuitive interfaces. Some come with pre-packaged “sanding/polishing kits” (e.g., UR+ solutions, or OnRobot sanding kits) that make it plug-and-play to start a finishing application . This lowers the programming barrier.
-
Safety: If the task involves a human loading/unloading parts frequently and you want to avoid hard fencing, a cobot may allow a semi-collaborative setup. For example, an operator could polish one side of a part manually while the cobot polishes the other side, theoretically. However, note that many finishing processes (grinding in particular) inherently aren’t very “collaborative” because of flying debris and tool hazards – often even a cobot will still be enclosed or shielded for those reasons.
-
Precision in Light Tasks: Cobots can be very precise and their force limiting can prevent them from ever exerting excessive pressure. For delicate operations, like buffing a thin piece that could bend, a cobot’s gentle touch might be ideal.
The downsides of cobots include limited payload (usually under ~10–15 kg for many models, though some go higher) and slower speeds. They also have lower inherent stiffness, which can affect results if you try to do heavy grinding – the cobot might compliance too much under load or vibrate.
In many cases, if your finishing task is heavy-duty or high-throughput, an industrial robot is the better choice. For example, deburring sharp edges on large castings or grinding welds on steel assemblies will likely demand the power and robustness of an industrial robot. On the other hand, if your task is moderate and you prioritize ease of use or flexibility, a cobot can be a great option – such as polishing small stainless-steel components to a mirror finish, or sanding wooden parts in a furniture shop where human workers are nearby.
To put it simply: use an industrial robot when you need muscle and speed; use a cobot when you need finesse and close human integration. It’s worth mentioning that you can also implement safety-rated force control on an industrial robot which allows some of the benefits of collaboration (by slowing or stopping the industrial robot when someone enters the cell, for instance). This hybrid approach sometimes appears in finishing cells for safer human interaction without sacrificing robot performance.
Lastly, consider the workspace and regulatory aspects. Even if a cobot doesn’t require a fence by design, if it’s wielding a spinning grinder, you may still end up putting a barrier for debris containment – thus negating some collaborative benefits. Always conduct a risk assessment. Kingstone Robotics and other integrators can advise on whether a collaborative solution is appropriate or if a standard robot with proper safeguarding is better for a given finishing application.
When would a specialized CNC polishing/grinding machine be more appropriate than a robotic arm?
In some cases, a dedicated CNC polishing or grinding machine might be more suitable than a general-purpose robotic arm. A CNC polishing/grinding machine is typically a system built specifically for finishing tasks, often with multiple axes (but usually in a fixed configuration, not as flexible as a robot arm) and possibly multiple spindles or heads designed for the process. Here are scenarios where such a machine can be advantageous:
-
High Volume, Very Consistent Parts: If you have a single product or limited range of products that require the exact same finishing operation, a custom machine can be optimized to do that extremely efficiently. For example, a CNC buffing machine with two spindles might buff both sides of a cookware pan simultaneously – faster than a robot moving a single wheel around. If the part geometry is consistent and the finishing path is fixed, the dedicated machine can often do it slightly faster or in a more synchronized way.
-
Simple Geometry but High Precision: For relatively flat or simple-shaped parts (like sheets, plates, or shafts) where extremely high precision surface finish is needed, a CNC grinding or polishing machine might offer more rigidity and control. Surface grinders (for flat surfaces) or honing machines (for internal surfaces) are examples that out-of-the-box deliver micron-level finishes which would be challenging for a free-moving robot to replicate.
-
Integrated Multi-Step Finishing: Some CNC systems can combine steps – e.g., start with a grinding belt, then automatically switch to a polishing wheel in the same machine, perhaps through multiple heads in a line. If your process can be streamlined by such a configuration, a specialized machine might do it without needing a robot to do tool changes or multiple operations. This could reduce cycle time for high-volume production.
-
Ease of Programming for Specific Tasks: A CNC machine’s programming (like G-code for a polishing head on a linear axis) might be more straightforward if the task is, say, to polish a flat surface evenly – you just program a raster motion. A robot could do that too, but a CNC machine might achieve it with simpler input. Moreover, the machine might come with built-in dressers or conditioning units for the abrasives that keep them performing optimally, something a generic robot cell would have to be custom-equipped with.
-
Cost Considerations: If a polishing machine can be built with fewer axes and simpler mechanics to do your job, it might cost less than a full 6-axis robot cell. This can be true for specialized tasks. However, if you need flexibility for different tasks, that cost advantage disappears.
However, there are trade-offs. A robotic arm offers flexibility – it can be reprogrammed for new parts and processes relatively easily. A specialized machine tends to be designed around a specific part or process; if you change your product line or finishing requirements, the machine might not accommodate those changes (or would require hardware modifications). For companies that make many different products or frequently change designs, robots are typically more future-proof.
Kingstone Robotics provides both types of solutions – robotic cells and CNC polishing machines – because the best choice depends on the customer’s situation. As a rule of thumb: if you have a stable, high-volume production with a repetitive finishing operation that could be achieved with a simpler mechanical setup, a dedicated machine might yield the fastest throughput and easiest operation. If you need versatility to handle variety and more complex movements, the robotic arm is the better choice.
For example, consider finishing of stainless steel sinks. A CNC polishing machine with multiple heads might be built to polish the interior of sinks very quickly in a fixed sequence. If that’s all you produce, it’s a great solution. But if next week you need to polish car bumpers instead, that machine can’t do it – whereas a robot could be reprogrammed and fitted with a new fixture and tool to take on the bumpers. So, assess your production demands: dedicated machines for dedicated tasks, robots for flexible tasks (and sometimes a mix of both in a production line).
What end-of-arm tools and abrasives are used for robotic grinding, polishing, and deburring?
The end-of-arm tool (EOAT) is what actually makes contact with the part and does the work. In robotic surface finishing, there is a range of specialized EOAT available, each designed for different finishing processes:
-
Grinding Tools: Common grinding EOATs include angle grinder attachments and belt grinders. An angle grinder tool for a robot is essentially a motor (electric or pneumatic) with a mounting flange, which can hold various discs (grinding wheels, cutoff wheels, flap discs). These are used for tasks like grinding down weld beads or heavy stock removal on edges. There are also robotic belt sanders/grinders, which have a continuous abrasive belt running over rollers. These are great for blending and surface leveling; the robot can present the part to the belt or move the belt tool along the part. A company like PushCorp, for instance, offers belt grinding heads and passive compliance devices that mount on robots for consistent grinding pressure .
-
Sanding/Polishing Tools: Often, orbital sanders or rotary polishers are used. An orbital sander EOAT mimics a hand-held orbital sander – it has a rotating pad that also orbits in a small ellipse. These are excellent for fine polishing, paint sanding, or working on wood and plastic surfaces. Rotary polishers or buffers are basically motor-driven spindles where you attach a buffing wheel or polishing mop. The robot can press this wheel against the part to buff it. Some tools have a built-in compliance (spring) so the wheel can conform a bit to the part shape.
-
Deburring Tools: Deburring EOATs can be divided into two types: cutting tools and abrasive tools. Cutting types include things like rotary deburring cutters (small carbide burrs) used with a high-speed spindle to trim flash or edge material. There are also pneumatically driven filing or scraping tools that can remove burrs (for instance, a reciprocating filing head). Abrasive deburring tools include wire brushes mounted on robot wrists to remove burrs and sharp edges – the robot moves the brush along the edges to clean them up. There are even compliant “deburring wheels” (like Scotch-Brite™ wheels) that can be robot-mounted for edge breaking. Many deburring applications use a compliant tool so that the burr, which can vary in size, is removed without gouging the part – e.g., a spring-mounted burr tool will give way once the burr is gone.
-
Brushes and Pads: For certain finishing (like achieving a satin or brushed finish on metal), robots use abrasive brushes or Scotch-Brite pads as EOAT. These can be either rotated or just pressed and dragged along the surface. They produce a uniform scratch pattern (common for appliance finishes or architectural panels).
-
Special Media Tools: Some processes like shot peening or abrasive blasting (though more surface treatment than finishing) might use an EOAT that directs media (shots or sand) at the surface. Those are less common under the umbrella of robotic “finishing” but worth noting as EOAT variants used for surface texturing or cleaning rather than polishing per se.
Each of these tools requires abrasives or media. Abrasives come in various forms:
-
Grinding wheels and disks: Made of bonded abrasive grains (aluminum oxide, silicon carbide, etc.) for heavy grinding.
-
Abrasive belts: Continuous belts with abrasive grit, used in belt grinder tools for blending and smoothing.
-
Sandpaper discs: Paper or film backed discs (with grits from coarse to very fine) that attach via hook-and-loop or adhesive to orbital or rotary tools.
-
Buffing wheels & Compounds: Typically cloth wheels (cotton, sisal) for buffing, used in conjunction with polishing compounds (waxes or pastes loaded with very fine abrasives like rouge). The robot may need to periodically apply compound to the wheel, which can be automated with a compound feeder.
-
Brushes: Wire brushes (steel, brass) or abrasive nylon brushes (impregnated with grit) for deburring and surface conditioning.
-
Non-woven wheels/pads: Like Scotch-Brite material, used for light deburring or cosmetic finishing.
When selecting EOAT and abrasives, consider the ease of integration. Many robot tool manufacturers provide ready-to-mount solutions with proven performance. For instance, ATI Industrial Automation offers an orbital sander kit (AOV-10) that has an integrated compliance and is designed for use on a UR cobot or similar . This kind of turnkey tool can simplify setup. PushCorp, as mentioned, has an array of grinding, sanding, and polishing heads with force control modules that are commonly used in the industry .
It’s also wise to plan for tool changing if multiple processes are needed. A robot could start with a grinding tool for rough work, then automatically switch to a polishing tool for finishing. This requires a tool changer on the robot wrist and multiple EOAT stations. Alternatively, some combined tools exist (for example, a tool that can both grind and then buff by changing attachments, but typically separate tools yield better results for each task).
Finally, consider abrasive wear and replacement. Robotic processes, being consistent, can actually extend abrasive life (as mentioned earlier, consistent force yields even wear). But you’ll need a routine for changing out belts, discs, or wheels once spent. Advanced cells might have an automated sensor to detect a worn abrasive (by monitoring force or process results) and signal it’s time for a change. Simpler systems rely on time-based preventive replacement or operator checks between cycles.
In summary: the EOAT is the “hand” of the robot that does the finishing – choose one tailored for your task (grinder, sander, buffer, etc.), and pair it with the correct abrasive media. With the right combination, a robot can tackle virtually any finishing job, from coarse grinding to mirror polishing.
What facility and infrastructure requirements come with robotic finishing systems?
Implementing a robotic finishing cell isn’t just about the robot itself; there are several facility considerations and possible modifications needed:
-
Floor Space and Layout: Ensure you have adequate floor space for the robot cell, including its safety fencing or area. The robot’s reach plus any ancillary equipment (part racks, tool stations, etc.) determine the footprint. You’ll want some clearance for maintenance access as well. The cell should be placed such that material flow is efficient – e.g., near the preceding manufacturing step (like near the welding station if it’s grinding welds). Sometimes a new layout is necessary since many shops weren’t originally set up for automation .
-
Power Supply: Robots and their tools require power. Check if you have the correct electrical supply – large industrial robots may need 480V 3-phase power. Additionally, many finishing tools (spindles, etc.) are pneumatic, so you might need a compressed air supply of sufficient pressure and flow near the cell. Ensure your compressor can handle the extra load if pneumatic grinders or air blast dust collectors are used.
-
Dust Extraction and Ventilation: As emphasized, finishing processes (especially grinding and polishing metals) generate dust and sometimes fumes (for example, polishing compound mist). It’s often necessary to have a dust collection unit connected to the cell. This could be a portable dust collector or a central extraction system with ductwork. If dealing with combustible dusts (e.g., aluminum or titanium dust can be explosive), there are NFPA guidelines to follow – you might need spark arrestors or special vacuum systems. Good ventilation is important for operator health if they’re near the cell, even if the robot is enclosed.
-
Floor/Foundations: Most robot finishing cells do not require special foundations; a standard industrial concrete floor usually suffices. However, heavy vibration can occur with big grinding operations. In some cases, mounting the robot to a sturdy baseplate or isolated foundation might improve performance (reducing vibrations). If the robot is pedestal-mounted or rail-mounted, secure anchoring is needed. Check floor condition where anchors will go.
-
Utilities for Coolant or Fluids: Some grinding and polishing processes use liquid coolants or lubes (to reduce heat, flush debris, etc.). If your process requires wet finishing, plan for a coolant supply and a containment tray or pit to collect runoff. A wet finishing cell will need plumbing and possibly a filtering system to recycle the coolant. On the other hand, many robotic cells opt for dry processing with dust extraction to avoid the mess of coolant.
-
Lighting and Vision Needs: If the system includes vision (camera) for part location or inspection, proper lighting in the cell will be necessary. This might involve adding controlled LED lighting inside an enclosure to ensure the camera can see the surface properly. For example, if you use a vision system to check the finish or guide the robot to a randomly oriented part, you’ll need consistent lighting and maybe anti-glare measures.
-
Safety Systems: You will likely need to integrate safety devices into your facility’s safety circuit. This means connecting emergency stop circuits of the robot to your plant’s E-stop system if applicable, setting up interlocks on cell doors that cut power when opened, possibly floor scanners or light curtains if you want an opening for material handling. You might also need a lock-out tag-out procedure and hardware for maintenance (a way to lock robot power off while someone services a tool).
-
Network and Data: Modern robotic systems often are network-connected. If you plan to collect production data or use Industry 4.0 analytics, ensure network drops are available. If multiple systems need to coordinate (like the robot communicates with a conveyor PLC), you’ll integrate via fieldbus or Ethernet, so IT involvement might be needed.
-
Environmental Conditions: Check the ambient environment. Extremely dusty, hot, or humid factory conditions might require protective measures for the robot controller (which typically sits in an electrical cabinet). Finishing processes can be dirty; keeping the robot’s base and joints from accumulating too much debris is important. Some cells include bellows or covers on the robot if it’s a particularly harsh environment (like grinding cast iron which is very dusty). Temperature swings in a non-climate-controlled shop can also affect precision – a consistent environment is better if high precision finishing is required.
In summary, installing a robotic finishing system is a project that touches on facilities (space, power, air), safety (fencing, interlocks), and environmental control (dust collection, etc.). It’s not overly burdensome, but it does need planning. Many integrators, including Kingstone Robotics, will help specify these requirements during the project. For example, a delivered system might come with its own dust collector and enclosure included, just needing the customer to provide hookup to power and compressed air. Being prepared on the facility side ensures a smooth installation and ramp-up for your new robotic cell.
Can one robot handle multiple different finishing tasks (grinding, polishing, deburring) on different products?
Yes, a single robotic system can be designed to perform multiple finishing tasks on different products, although there are practical limits and trade-offs to consider. The flexibility of a robot is one of its biggest advantages over dedicated machinery. Here’s how one robot can multitask:
-
Tool Changing: A robot can be outfitted with an automatic tool changer on its wrist. This device allows the robot to pick up and drop different end-of-arm tools as needed. For example, the robot could have a grinding head, a polishing/buffing head, and a deburring tool stationed in a rack. It could grind a weld on a part, then swap to a buffing wheel to polish another area of the same part or a different part. Tool change cycles add some time, but modern systems can swap tools in seconds. This enables one robot to sequentially perform different processes.
-
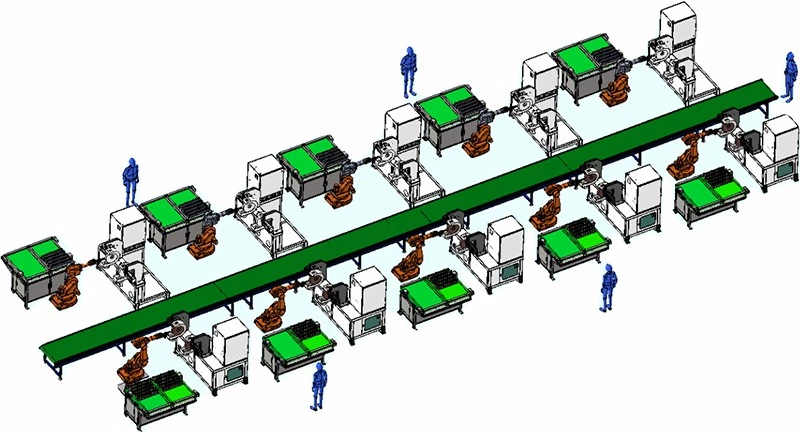
Multiple Stations/Fixtures: The workcell can be laid out so the robot can move between stations. Perhaps Station A holds a part that needs grinding, Station B holds a different part that needs polishing. The robot can service both, even concurrently if programmed cleverly (though typically one operation at a time unless you have dual-arm robots). In some manufacturing lines, a robot might deburr one part, then immediately move over and polish another part – essentially two processes in one cell.
-
Programming and Recipes: The robot’s program can have different “recipes” for different products or tasks. Operators can load a specific program depending on the part type. If designed well, changeover can be as easy as scanning a barcode or selecting the part number, and the robot will run the appropriate sequence, use the correct tool, etc. This is very useful in job shops or any setting with mixed production.
-
Combined Process Tools: In some cases, a single tool can do multiple processes by changing media. For instance, a compliant spindle could first use a coarse abrasive disc to sand, then switch to a fine disc (manually or via automatic feeder) to polish. This is less common but possible if the processes are similar in nature.
That said, there are considerations and limitations:
-
Cycle Time and Scheduling: If one robot is doing it all, it might become a bottleneck if the demand for each process is high. For example, if polishing one product takes 5 minutes and deburring another takes 3 minutes, and they’re needed in parallel, one robot would have to do 8 minutes of work sequentially. If your production rate can’t allow that, you may need multiple robots or cells. Often, multi-tasking is ideal for lower volumes of each task or when processes are short.
-
Physical Reach and Setup: The robot has to physically reach the areas for each process. If the tasks are very different (say polishing a large sheet vs deburring inside a small hole of another part), the cell setup becomes complicated to accommodate both effectively. You might need changeable fixtures or compromise on optimal positioning.
-
Calibration and Consistency: Each tool and station adds potential variation. The system should be calibrated so that when the robot switches tools, it knows the exact tool geometry (tool center point, etc.) to continue accurate processing. Modern robots handle this well with calibration routines. Still, more moving pieces means more complexity to maintain.
-
Skill and Programming: Setting up a multi-process, multi-product cell is a more complex programming task. It requires carefully planning the workflow, tool changes, and ensuring no collisions or interference between stations. This is where an experienced integrator like Kingstone Robotics can be invaluable – they have likely commissioned cells where one robot does grinding + polishing in one go. It’s certainly achievable, but not as plug-and-play as a single-purpose cell.
From a buying perspective, if you have several finishing operations but not enough volume to justify separate robots for each, a combined approach can save cost. The ROI might be better with one multi-use robot than 2-3 specialized ones, even if cycle time per part is slightly longer, as long as it meets overall throughput needs.
In practice, many companies start with a robot doing one task (say deburring), then later see if they can extend it to do another (like minor polishing) when the robot has free time in its cycle. It’s wise to discuss such possibilities upfront so the cell can be designed to accommodate additional tools or part fixtures.
In summary, one robot can be a multi-tool finisher – it just requires smart cell design and programming. This flexibility is one of the reasons robotic automation is popular: you can redeploy or upgrade the robot for new tasks as your needs evolve, rather than being locked into one operation.
What challenges or difficulties might arise when automating surface finishing?
Automating surface finishing is certainly beneficial, but it’s known to be one of the trickier processes to automate. Several challenges can arise:
-
Complex Process Variables: Finishing has many interdependent variables – tool speed, contact force, angle of approach, abrasive type, abrasive wear over time, number of passes, etc. Achieving the desired finish means tuning all these parameters correctly . In manual finishing, an expert unconsciously adjusts on the fly. Programming those adjustments into a robot (or ensuring the robot doesn’t need them through compliance and good fixturing) is a challenge. If not done right, you might get inconsistent results or a finish that’s not up to spec initially. There can be a debugging period to dial in the “recipe.”
-
Part Variability and Fixturing: Real-world parts often have slight variability (tolerances from upstream processes, distortions like weld shrinkage, etc.). If a robot is expecting a part to be exactly a certain shape and it’s not, the finishing results could suffer (missed spots or uneven pressure). Ensuring repeatable part positioning with good fixtures and using sensors (like force feedback or vision) to detect variations are ways to handle this. Without those, part variability is a major headache – the robot might polish air in a spot where the part is actually a millimeter away. Some advanced systems use 3D vision to scan each part and adjust the polishing path accordingly, which adds complexity but solves variability issues .
-
Teaching/Programming Effort: Creating a path that covers a complex 3D surface uniformly is not trivial. For simple shapes, it’s easy (e.g., polishing a flat plate: just raster scan it). But for something like a turbine blade or a curved automobile body part, the programmer might need to use offline programming tools and spend significant time to generate a smooth tool path. Modern CAD-based programming helps, but it’s an upfront effort. Also, the program must incorporate proper approach/retract moves, handle tool changes, etc. It’s a more complex program than, say, a straightforward pick-and-place operation.
-
Tool Wear and Compensation: Abrasives wear out as they are used. In a manual process, the worker might instinctively press a bit harder or spend a bit more time once the sandpaper is getting dull, or change it when they feel it’s done. A robot will keep going with a worn abrasive unless it’s programmed to do otherwise. So, you need a strategy: either monitor the process (perhaps via force feedback or visual inspection) to know when to change the abrasive, or conservatively program a change after a certain number of parts. If not, the finish on part #50 may not match part #1 because the abrasive was spent. Some systems have clever ways to gauge this – e.g., measuring motor current or force; if they see it creeping up (indicating dull abrasive requiring more force), they flag a change. Implementing such monitoring is an extra challenge but often worth it.
-
Material Handling and Integration: Finishing is often one of the last steps. If the automation around part handling isn’t well set up, the robot might sit idle waiting for parts, or human intervention might be needed frequently (reducing the automation benefit). Designing an integrated cell where parts can be loaded/unloaded efficiently (possibly in parallel with robot operation using a dual-station setup) can be tricky. If multiple part types are to be processed, flexible fixturing or identification systems need to be in place.
-
Consistent Quality Verification: How do you know the robot achieved the desired finish on each part? This is a challenge in manual finishing too, but at least a human can feel or visually check each part as they do it. With automation, you might incorporate quality checks – like a sensor to measure surface roughness or a camera to inspect the surface. These add cost and complexity. Without them, one relies on doing sample inspections. A risk is that if the process drifts (due to tool wear or other factors), you might produce a batch of parts out of spec before noticing. Setting up effective quality control (either automated or periodic manual checks) is thus important.
-
Initial Cost and Expertise: While not a technical “challenge” in the process itself, the barrier to entry can be a hurdle. Some companies find it daunting to invest in a finishing robot because the process was seen as an art. It can take time to accumulate the expertise to run it optimally. Workforce training is needed so that technicians understand how to adjust or maintain the system. Without skilled personnel (or good support from the integrator), the system might underperform until those knowledge gaps are closed .
-
Environmental and Safety Issues: If the automation isn’t properly configured, new issues can appear – for instance, dust accumulation in the robot’s joints, or excessive noise if an enclosure isn’t sound-proofed. These are solvable, but one must pay attention. Additionally, grinding robots exert a lot of force; a tool breakage can potentially send fragments flying – the system needs robust safety engineering to mitigate such events (e.g., guards, tool condition monitoring).
The good news is that all these challenges are well-known in the industry, and there are “best practices” and technologies to address them. For example, the use of active compliance and force control addresses a lot of the variability and contact issues . Smart programming and sensors tackle the rest. It’s also worth noting that automation technology has advanced, making surface finishing more accessible than before. One expert noted that despite the historic notion of finishing being a black art, today any polishing or grinding application can be successfully automated with the right approach .
In planning an automation project, acknowledging these challenges and working with experienced solution providers is key. A company like Kingstone Robotics, with specialization in finishing, can draw from numerous past projects to anticipate these issues. They might do trials on sample parts to determine optimal parameters, thus reducing risk during deployment. In summary, automating finishing is challenging but far from impossible – careful attention to process control, adaptability, and quality feedback are the ingredients to overcome those challenges.
What role do advanced technologies like vision and AI play in robotic surface finishing?
Advanced technologies such as machine vision, artificial intelligence (AI), and machine learning are increasingly being integrated into robotic finishing systems to enhance their capabilities:
-
Machine Vision for Guidance and Inspection: Vision systems can help robots “see” the parts they are working on. This can be used in multiple ways. For example, a vision camera might locate a part’s exact position and orientation on a fixture, allowing the robot to adjust its polishing path to match – important if there is any variability in how parts are loaded. Vision is also used to inspect surfaces either before or after finishing. An AI-based defect detection system could scan a surface to find scratches, pits, or remaining burrs and then direct the robot to address those specific spots . Portwell, for instance, has showcased AI vision combining with robotics to do real-time analysis of visual data during polishing, identifying defects that need extra attention . This ensures high quality by effectively giving feedback to the robot about where more work is needed.
-
AI and Machine Learning for Process Optimization: AI can analyze data from the finishing process (forces, motor currents, acoustic emission, etc.) to predict outcomes or adjust parameters. For instance, a machine learning model could predict the endpoint of polishing by correlating sensor data with achieved surface roughness, thus telling the system “stop now, the target finish is reached.” Over time, an AI could learn optimal feed rates or force profiles for different shapes to minimize cycle time while maintaining quality. Some research initiatives and companies are focusing on “self-optimizing” finishing processes using AI that adapt to part variations automatically.
-
Path Planning with AI: Automated path generation is being enhanced by AI. Instead of manually programming complex paths, AI algorithms can potentially take a CAD model of a part and automatically generate an efficient tool path for uniform coverage. They might optimize the path to avoid dwell marks or to reduce movements that cause vibration. If a new part design comes in, an AI-driven system might quickly adjust the path based on learned similarities to previous parts, reducing reprogramming effort.
-
Predictive Maintenance and Analytics: By monitoring the health of the robot and the tools using sensors and AI analytics, the system can predict when a tool will wear out or if a motor is getting overloaded. For example, if over many cycles the system notices the polishing motor current gradually increasing (indicating the wheel is wearing and the robot compensates by pressing harder), it could flag a tool change before quality degrades. Similarly, vibration sensors might detect an imbalance in a grinding wheel and schedule a dressing routine or replacement. This predictive approach minimizes downtime and keeps quality consistent.
-
Cognitive Cobots and Ease of Use: For collaborative robots, AI is used to make them easier to deploy in finishing tasks. Some systems allow a user to physically guide a robot through a polishing motion, and the robot “learns” that trajectory. AI can then generalize that to other similar parts or optimize the force applied along that taught path. Essentially, the AI bridges the gap between a skilled worker’s knowledge and the robot’s repeatability.
-
Quality Documentation and Traceability: Vision systems can also document the surface finish quality of each part (by taking images or even 3D scans). This data can be logged, providing traceability – useful in industries like aerospace or medical where you want proof that each part met spec. AI can assist by automatically grading the surface (pass/fail or a quantified roughness) from those images, saving manual inspection labor.
A concrete example: imagine a robotic deburring system for machined parts. Parts coming out of a CNC machine have burrs of varying size. A 3D vision camera scans the edges and an AI algorithm identifies where burrs are and how large. The robot then adjusts its deburring passes dynamically – perhaps slower on a big burr, faster on a small one, maybe even skipping edges that were already clean. After deburring, a second scan confirms all edges are clean. This whole closed-loop operation reduces over-processing and ensures quality without human checks.
While not every finishing cell today uses these high-tech features (due to added cost and complexity), the trend is moving in that direction, especially for high-value parts where quality is paramount. Kingstone Robotics has been integrating smarter controls and vision into their systems – for instance, their systems can be equipped with vision for part alignment or with real-time monitoring for safety and quality . The bottom line is that vision and AI provide the “eyes and brain” to complement the “brawn” of the robot, making automated finishing more intelligent, adaptive, and reliable.
What maintenance and upkeep are required for a robotic finishing system to ensure consistent quality?
Like any piece of industrial equipment, a robotic finishing cell requires regular maintenance to keep it running optimally and to ensure the quality of output remains high. Key maintenance aspects include:
-
Robot Maintenance: The robot arm itself has recommended maintenance from the manufacturer – typically greasing of joints, checking gearboxes for backlash, inspecting cabling for wear, etc., on a periodic schedule (often yearly or based on hours of operation). Given the dirty environment of grinding, it’s important to keep the robot’s seals and protective covers in good shape. Any accumulations of dust around the robot should be cleaned to prevent ingress. Encoders or reference positions might be checked if precision seems off. If the robot has been occasionally crashed or overloaded, more frequent checks of calibration might be needed. Keeping the robot calibrated ensures it follows programmed paths accurately.
-
Tool Maintenance: The spindles, motors or pneumatics in the end-of-arm tools need care. For pneumatic grinders, that means filtered, lubricated air supply and checking vanes and bearings periodically. For electric tools, brushes or other wear parts may need replacement after so many hours. If a belt sander EOAT is used, belts must be tracked properly and rollers kept in alignment – sometimes automatic belt tracking is part of the design, but it should be verified. Any compliance unit (e.g., a spring or air cylinder providing force) should be inspected for proper function (springs can fatigue, air cylinders can leak).
-
Abrasive/Media Changes: The most frequent “maintenance” in finishing is actually changing out consumables – grinding wheels, sanding discs, belts, buffing wheels, compounds, brushes, etc. Having a documented schedule or criteria for change is crucial. Operators or technicians should inspect the abrasives routinely (often multiple times a day or each shift) to ensure they haven’t worn beyond acceptable limits. Dull abrasives not only reduce quality but can cause excess heat and strain on the system. Some cells incorporate a wheel dresser (for grinding wheels) – if so, that dresser (often a diamond nib) itself is a consumable that must be replaced to continue effectively dressing the wheel.
-
Dust Collection System: If your cell has filters or dust collectors, those require maintenance. Filters need cleaning or replacing on schedule, dust bins need emptying. A clogged dust filter will reduce suction, possibly allowing dust to accumulate in the cell and on the part (bad for quality and potentially hazardous). Also check hoses and seals in the dust collection for clogs or leaks. Many companies incorporate differential pressure sensors on filters to signal when they need replacement.
-
Fixtures and Alignment: Over time, fixtures can wear or get out of alignment (for example, if parts are clamped repeatedly, the locator pins might wear down or bend). It’s important to periodically verify that the fixturing still positions parts correctly for the robot’s program. If any drift is found, re-adjust or re-calibrate the robot’s coordinates accordingly. Loose bolts in fixtures or tool mounts can cause vibration and quality issues, so part of maintenance is to tighten and secure mechanical joints.
-
Recalibration and Quality Checks: Robots can maintain calibration for long periods, but in a high-force environment things might subtly shift. It’s wise to schedule periodic calibration checks – this could involve jogging the robot to known reference points or using a calibration artifact. Additionally, regularly measure the quality of a sample finished part and track that over time. If you notice roughness creeping up or dimensional drift in edges being ground, it could indicate something in the system (dulling abrasive, slight path shift) needs correction.
-
Software and Backup: Maintain backups of robot programs and parameters. It’s not a daily maintenance item, but whenever changes are made or on a regular schedule, back up the system so you can restore it if something goes wrong. Keep software updated if updates address issues (but also be cautious to validate any changes to ensure they don’t affect the process).
-
Safety Device Checks: Just as with any equipment, test the emergency stops, light curtains, door interlocks, etc., routinely to make sure they still function. The rugged environment of grinding can be rough on sensors and wiring, so confirm that safety circuits are intact. Also, ensure signage and guarding remain as originally set – sometimes employees might remove a panel for access and not put it back; that should be caught and corrected.
-
Lubricants and Coolants: If your finishing uses coolant or lubricant, maintain the fluid levels and cleanliness. Coolant can grow bacteria or lose effectiveness, so periodic replacement or filtration is needed. Pumps and nozzles for coolant should be inspected (no clogs, aimed correctly).
-
General Cleaning: While the dust collector does its job, a certain amount of debris will settle in the cell over time. Schedule cleaning of the cell to remove accumulated dust in corners, on sensors, on the robot itself (carefully). This prevents long-term issues like abrasive dust working its way into seals or causing sensor failures.
A well-maintained finishing robot can run for years delivering consistent quality. There’s a saying: Consistency is the hallmark of automation, but that only holds if the system is kept in the same condition as when it was first tuned. Regular maintenance is how we preserve that consistency. Many users set up a maintenance log and standard operating procedures for their robotic cell. Kingstone Robotics typically provides maintenance schedules and training as part of a project handover – covering all these points so the customer knows how to keep the system in prime shape. The investment in maintenance pays back through reduced downtime and sustained high quality (thus protecting your ROI as well).
3. Application Scenarios (Industry Use Cases)
Robotic grinding, polishing, and deburring are used in a wide range of industries. In this section, we discuss common application scenarios and examples of how different sectors employ these technologies. We’ll explore heavy industries like automotive and aerospace, as well as precision sectors like medical devices and consumer products. We also touch on typical tasks robots handle in these industries and the benefits realized.
Which industries commonly use robotic surface finishing?
Many manufacturing industries have integrated robotic surface finishing to improve their production. Here are some of the most common sectors and why they use it:
-
Automotive Industry: Car manufacturers and suppliers use robots for tasks such as grinding weld seams on car bodies, deburring engine components, and polishing exterior trim. For example, after a car body is welded, robots grind down the welds to create a smooth surface before painting. In automotive foundries, cast aluminum or iron parts (engine blocks, transmission cases) are robotically deburred to remove flash. Robots also polish moldings, emblems, and even headlamp covers for cosmetic perfection. The automotive sector values the speed and uniformity – every car needs consistent finishes to meet quality standards .
-
Aerospace Industry: Aerospace manufacturers utilize robotic finishing for high-precision requirements. Robots grind and polish turbine blades, engine parts, and airframe components. In aerospace, materials are often hard superalloys that are difficult to finish manually, so automation brings both consistency and the ability to handle tough materials. For instance, grinding robots can shape and finish turbine blades to extremely tight tolerances that ensure engine efficiency . They also polish critical surfaces (like landing gear parts or hydraulic components) to prevent stress risers. Automation here improves quality (fewer nicks and scratches than manual) and protects workers from hazardous materials (e.g., nickel alloy dust).
-
Medical Devices: The medical field uses many metallic implants (hip joints, bone plates, surgical tools) that require polishing to a mirror finish for both functionality and aesthetics. Robotic polishing is applied to orthopedic implants (knees, hips) to get smooth, mirror-like surfaces that reduce friction in the body. Also, surgical instruments are often ground and sharpened by robots; for example, a robot can grind a scalpel or a needle point with extreme consistency . The clean, consistent finish is critical for performance and hygiene, and robots help eliminate human contamination and variability.
-
General Metal Fabrication: Beyond these specific industries, any metal fabrication or machining shop with significant finishing operations might use robots. This includes manufacturers of appliances (e.g., polishing stainless steel refrigerator doors or sink basins), hardware and tools (grinding and buffing hand tool surfaces or cutlery), and oil and gas equipment (deburring large valves or pipes). Robots are popular for finishing large weldments or structures that are cumbersome for humans – for example, polishing the surface of a large pressure vessel or deburring huge laser-cut profiles.
-
Consumer Products and Electronics: Many consumer goods require attractive finishes. For instance, manufacturers of faucets and bathroom fixtures often use robotic polishing to achieve a flawless chrome finish on faucets and handles. The shapes are complex and require multi-axis movement to polish all curves – something robots excel at. In electronics, aluminum or stainless casings (like those for smartphones or laptops) might be robotically polished or brushed to get that perfect texture (Apple’s famous device casings go through such automated finishing for consistency).
-
New Energy and Transportation: In sectors like rail transit or renewable energy, robotic finishing finds use in building wind turbine components (where massive fiberglass blades are sanded by robots) or rail car manufacturing (grinding welds on train car bodies). Even shipbuilding has started to explore robots to grind welds on ship hulls, given the scale of those jobs.
-
Precision Engineering/Optics: Special cases include using robots to polish molds, dies, or even optical components. For example, molds for automotive glass or plastic lenses need a mirror finish – robots with compliant polishing heads can achieve this repeatedly. Some robots polish large telescope mirrors or other optical parts, though these often require extremely high precision (sometimes a combination of robotic and CNC control is used there).
In summary, any industry that has products requiring smoothing, shaping, or finishing of surfaces is a candidate. The common thread is that these industries either deal with high volumes (automotive) where automation boosts throughput, stringent quality (aerospace, medical) where consistency is key, difficult working conditions (foundries, shipyards) where robots improve safety, or precision aesthetics (consumer products) where a perfect finish differentiates the product. Kingstone Robotics has delivered solutions across many of these sectors – from grinding solutions for aerospace turbine blades to polishing cells for bathroom hardware – demonstrating how broadly applicable and beneficial robotic finishing can be .
How are robotic grinding and deburring used in the automotive and aerospace sectors?
Both automotive and aerospace industries heavily employ robotic grinding and deburring, though for somewhat different specific applications:
Automotive Sector (Robotic Grinding & Deburring):
In auto manufacturing, the body shop and fabrication areas use robots to handle tedious and hazardous grinding jobs. A prime example is weld grinding on car bodies. After the various panels of a car are welded (often by welding robots), the weld beads that remain on visible surfaces (like door sills or roof joints) need to be smoothed out. Robots equipped with grinding or sanding heads move along these seams to level them flush with the surrounding metal . This results in a smooth surface that, after painting, looks seamless.
Another use is in casting and machining lines: Engine blocks, transmission housings, bracketry, etc., are often cast and then machined. These parts can have burrs or flash. Robotic deburring cells trim the flash off castings and chamfer sharp edges that machining left behind. For instance, a robot might use a carbide burr to deburr all edges of an engine block’s cylinder ports and then switch to a brush to smooth them – something that used to require many hours of manual filing. The consistency means each engine block meets specifications with no stray metal bits that could break off later.
In addition, finishing structural parts: Automotive frames or subframes that are welded together often require grinding of joint areas for aesthetics or fit. Robots can grind those welds reliably. They also deflash plastic components (e.g., trimming injection-molded bumper covers or interior panels using robotic routers).
A specific example: Consider an automotive supplier making exhaust pipes. The pipes have welds where brackets attach. One of Kingstone’s case studies might describe using a robot with a belt grinder (the ABG tool) to grind stainless steel exhaust pipes, achieving identical reproducible surface quality with high output . The result is reliable cycle times with no rework necessary – a good illustration of robotic grinding in automotive components.
Aerospace Sector (Robotic Grinding & Deburring):
Aerospace parts are typically high-value and require precision. Robotic grinding in aerospace is often about shaping and blending rather than just aesthetics. For example, aero-engine components like turbine blades and blisks (bladed disks) undergo robotic polishing and grinding to perfect their airfoil surfaces. A robot might carefully grind the edges of a blade to remove casting parting lines or to smooth out areas after machining, ensuring the blade’s profile is exactly as needed for aerodynamic performance . The tolerances are tight, so the robot may have integrated measurement to check its work or a predefined high-precision path.
Deburring in aerospace is crucial for safety. Any burr or sharp edge left on a part (say inside a fuel system component or on a structural bracket) could become a stress concentrator or FOD (foreign object debris) if it breaks off. Robots deburr holes on large airframe parts or trim composite edges on things like fuselage sections. For instance, after drilling thousands of rivet holes in a wing panel, a robot with a countersink bit might go and deburr each hole’s exit side to ensure no burr remains – an enormous time saver over manual deburring of each hole.
Another area is aerospace gear and turbine discs. These often require radiusing of edges (a form of deburring to create a smooth edge rather than a sharp one). Robots can perform this with brushes or grinding stones uniformly around complex profiles, achieving improved fatigue life for the part.
Why robots for these? Aerospace parts often involve hard alloys (titanium, Inconel) that are very tough to work manually. Robots provide the needed force and endurance. Also, consistency is vital – one nick on a turbine blade from manual mishandling could cause that blade to be scrapped; robots eliminate that human risk and produce uniform results across all parts. Moreover, aerospace has detailed process documentation; robotic automation ensures the process is done the same way every time, satisfying these requirements.
In summary, in automotive, robots grind and deburr to clean up welds and edges primarily for assembly fit and cosmetic finish, handling volume tasks that would be injuries-waiting-to-happen for humans (grinding in awkward car body positions, etc.). In aerospace, robots grind and deburr for precision and part integrity, performing tasks humans physically struggle with while delivering superior consistency. Both sectors see improved cycle times and worker safety: automotive plants increase productivity (e.g., one case showed finishing a part in less than half the time with a robot, boosting productivity by 150% ), and aerospace shops maintain quality and reduce bottlenecks in hand finishing processes by using robots.
How are robotic polishing and buffing used in consumer products and electronics manufacturing?
In consumer product industries – which include everything from kitchen and bathroom hardware to electronics to luxury goods – surface appearance is a key quality attribute. Robotic polishing and buffing are employed to achieve high-quality finishes that are both visually appealing and functionally appropriate, with consistency at mass-production scales:
Bathroom and Kitchen Hardware: Think of items like faucets, shower heads, door knobs, cabinet handles, sinks – many are made of metal (brass, stainless steel) and often chrome-plated or otherwise finished. Before plating, these parts must be polished to a smooth shine (any scratch or roughness will show through plating). Robotic polishing cells handle these parts with various shaped wheels and buffs. For example, a robot might polish the curved surface of a faucet spout with a cloth buff, ensuring the entire surface is uniformly smooth. Then it might buff it to a mirror shine. Kingstone’s robot buffing units have been used for such purposes, delivering uniform polishing on metals and even plastics for things like sanitary ware . The benefit is every faucet gets the same treatment – no variation from part to part – and the dangerous cotton buffing (which produces lots of dust and lint and can catch on spinning wheels) is taken out of workers’ hands.
Appliances and Consumer Electronics: For appliances, consider stainless steel refrigerator doors or ranges. These often have a brushed finish. Robots can apply a Scotch-Brite belt or wheel to produce that straight-line brushed grain perfectly evenly across the panel, far better than a human with a handheld sander could. In electronics, devices like smartphones or laptops with metal cases go through polishing steps to achieve a premium look (be it brushed, matte, or glossy). Robotic polishing ensures that each unit has the same surface texture, which is crucial when millions of units are produced. Also, small parts like smartwatch cases or camera bodies are polished robotically because of the tiny tolerances and fine finish needed.
Luxury Goods: Items such as watches, jewelry components, eyewear frames (high-end sunglasses, for example) see robotic polishing increasingly. A watch case might be buffed by a robot to get that flawless shine on the metal or sapphire crystal, using tiny buffing tools in a precise dance. The consistency is a selling point – every watch of the same model gleams identically.
Plastic Components: Polishing isn’t just for metals. Consumer products with clear plastic parts (like acrylic display screens or cosmetic packaging) sometimes require a polishing process to remove blemishes or smooth the surface. A robot can polish plastic lenses for LED displays or sand out parting lines on plastic housings. In automotive, for instance, the clear polycarbonate headlight covers are often robotically buffed after forming to ensure optical clarity and remove any minor scratches.
Why robots in these cases? Largely for consistency, volume, and labor savings. Polishing for appearance is labor-intensive and often piecework in many factories. It’s also messy (with compounds) and requires skill to not overpolish edges or miss spots. Robots, once programmed, follow the exact pattern needed to achieve the design aesthetic. They don’t round off edges inadvertently or leave swirl marks if properly configured. Consumer product companies also value the throughput – a robot can typically polish faster than a human for these items, meaning higher production rates to meet market demand.
A practical example: Car alloy wheels – while not electronics, they’re consumer-facing products (aftermarket custom wheels especially) – these are often robotically polished. The robot handles the complex curves of a rim, using different polishing heads on the spokes vs the lip, to achieve a chrome-like finish if that’s desired. Trying to get identical shine on 4 wheels by hand is quite difficult; a robot ensures all come out the same.
Another example could be smartphone casings: an aluminum unibody phone case might go through automated sanding and polishing to create the desired satin finish. A StandardBots article on cobot sanding even suggests using cobots to polish and buff such parts with ease and consistency .
In summary, robotic polishing in consumer and electronics fields is about giving products a premium finish reliably. The robot is essentially acting as an army of skilled polishers, each product receiving the same attention. The ROI is realized in fewer cosmetic defects (reducing rejects), faster production, and marketing advantage (beautiful finishes). At Kingstone Robotics, for example, their buffing solutions have been applied to 3C electronics (Computer, Communication, Consumer electronics) and automotive trim, showcasing how one automation approach can serve diverse consumer product needs by just changing the tooling or programming for each specific part .
What about robotic finishing in medical devices and precision electronics (for delicate or high-precision parts)?
Robotic finishing is also prevalent in industries requiring very high precision and delicate handling, like medical devices, precision instruments, and electronics manufacturing (for small components).
Medical Devices: As mentioned, implants (like hip and knee replacements) need extremely smooth, mirror-like surfaces in certain areas (the bearing surfaces that contact bone or another implant). Robots polish these surfaces to a mirror finish to within microns of tolerance. One reason robots excel here is repeatability – every implant of the same design gets the same finishing path, ensuring uniform curvature and smoothness, which is critical for something that will articulate in the body. Additionally, robots can work in clean-room like conditions if needed (reducing contamination), and they relieve humans from exposure to fine dust from materials like cobalt-chrome alloys (which implants often use and which create harmful dust when polished).
Another medical example: surgical scissors or needles – robots can grind the cutting edges consistently. A robot with a grinding wheel can put the edge on surgical scissors, ensuring they have the exact correct angle and sharpness. With machine vision, it can even inspect the edge for burrs and then fine-buff it. The result is reliable cutting performance in surgeries. The medical industry often automates finishing because it also provides excellent documentation – you can validate a robotic process once and then you know all parts finished by it are identical, aiding regulatory compliance (e.g., FDA process validation).
Precision Electronics Components: Think about small connectors, semiconductor equipment parts, or microelectronic casings. These sometimes have tiny burrs or require fine surface prep. While many electronic components are too small to individually polish with a robot, larger precision parts (like hard disk drive disks, or semiconductor wafer chucks) might be polished with automated systems. Robotic arms can also handle tasks like laser deburring or micro-polishing certain surfaces where needed.
Delicate Materials: Finishing delicate parts, like very thin walled components or flexible materials, can be a challenge manually because humans might apply too much pressure and deform the part. Robots, with force control, can be tuned to be gentle. For instance, some medical device components are made of nitinol (a superelastic alloy). If you need to deburr a tiny nitinol stent (mesh tube), a robot with a micro-deburring tool under low force could carefully remove burrs without bending the part, a task nearly impossible by hand with the same consistency.
Optics and Instruments: Polishing of optical components (lenses, mirrors) sometimes uses robotic platforms (though often custom CNC machines). Robotic handling and polishing might be used for instrument housings or sensor components where alignment of surfaces is key.
Quality and Cleanliness: Precision industries demand high quality. Robotic finishing eliminates the risk of human error like over-polishing one spot or leaving a tool mark. Also, in clean or sterile environments, fewer humans means less contamination. It’s easier to maintain a controlled environment around a robot (with proper attire and cleaning) than around a large group of manual polishers.
Collaborative robots in labs: We even see collaborative robots in laboratory or small production settings doing tasks like polishing small samples or prototypes, because they can work in tight spaces and are easily reprogrammable for different tasks. A cobot might hold a part against a fixed polishing wheel, or vice versa, as a flexible assistant.
In summary, even for delicate, tiny, or extremely high-precision parts, robotic finishing finds application. The key is pairing the robot with the right fine-scale tools and sensors. When done properly, robots can achieve levels of precision and consistency that exceed human capability, while handling parts so delicately that breakage or deformation is minimized. These industries may not use robots in as high volume as automotive, but the value added per part is high, so the return on automating is significant in terms of quality assurance and yield improvement.
(To illustrate diversity: Kingstone’s projects range from large auto parts to smaller items. For instance, they mention medical industry polishing machinery – robots handling polishing in medical applications – and custom solutions for unique cases . This demonstrates that even high-precision fields trust robotics for surface finishing tasks.)
4. Benefits and Efficiency (ROI)
One of the main reasons companies invest in robotic surface finishing is the range of benefits – from increased productivity and consistency to improved safety and return on investment. In this section, we explore the advantages of automating polishing/grinding tasks, discuss how to measure ROI and payback periods, and look at efficiency gains like reduced scrap and labor savings.
What are the main advantages of using robots for surface finishing compared to manual methods?
Robotic surface finishing offers numerous advantages over manual finishing, addressing many of the pain points of traditional methods. Key benefits include:
-
Consistency and Quality Uniformity: Robots deliver highly consistent results part after part. A human’s work can vary based on skill level, fatigue, or even mood; a robot’s work does not vary. This uniformity means fewer quality defects such as uneven finishes, missed spots, or variations in roughness. For example, in manual polishing, two parts might end up with slightly different shine, whereas a robot-polished batch will all meet the same spec. This consistency improves overall product quality and reduces scrap or rework . In industries like aerospace and automotive, uniform finishing also translates to better performance (e.g., uniform airflow over polished turbine blades, consistent paint adhesion on car bodies).
-
Higher Productivity and Throughput: Robots can generally work faster than humans for these tasks – they don’t tire, they can use higher tool speeds continuously, and they don’t take breaks. Additionally, a robot can often perform finishing on a part in less time by optimizing the path and using multiple axes to maintain optimal contact. Case studies have shown significant productivity boosts: one manufacturer of bathtubs reported a particular finishing task dropping from 4-5 hours manually to less than 2 hours with a robot (a >150% increase in productivity) . Moreover, robots can work 24/7 if needed (with minimal supervision), drastically increasing output capacity . This is especially beneficial if you face increasing demand or tight deadlines – you can run second or third shifts “lights-out” with robots.
-
Labor Cost Savings and Addressing Skilled Labor Shortage: Finishing is labor-intensive and often requires skilled artisans, who are increasingly hard to find and retain. By automating, companies save on labor costs and also alleviate the problem of skilled labor shortages. Instead of, say, 5 people grinding and polishing, you might have 1 technician overseeing 2 robots doing the work. The operational cost per part goes down after the initial investment. Many companies justify robots because they either can’t find enough qualified workers or the labor cost over a couple of years would equal or exceed the cost of automation. In recent years, the labor shortage in trades like welding and finishing has accelerated automation adoption .
-
Improved Worker Safety and Health: This is a major advantage. Manual grinding and polishing are physically taxing – workers endure noise, vibration, dust, and awkward postures. These lead to injuries like musculoskeletal disorders, nerve damage from vibration, hearing loss, and respiratory issues from inhaling particles . Robots remove workers from these harsh conditions. Fewer people developing grinder’s elbow or white finger syndrome is a tangible benefit. Also, from a safety standpoint, grinding and buffing tools can cause acute injuries (cuts, flying debris). Automation vastly reduces the risk of such accidents on the shop floor . In essence, robots take over the “dirty, dull, dangerous” tasks, and human workers can be reallocated to safer monitoring or higher-skill duties.
-
Consistency in Process = Easier Quality Control: Because robots follow programmed processes, it’s easier to implement standard operating procedures and maintain certifications. If you have quality standards or audits (say ISO or NADCAP in aerospace), having an automated, documented process helps ensure compliance every time. This also means reduced scrap and rework – parts are less likely to be rejected for poor finishing. One source pointed out that in manual operations, fatigue can cause defects and scrap, whereas robotic finishing minimizes this, thereby improving yield . Less scrap is directly a cost saving (materials and time not wasted).
-
Ability to Use More Aggressive or Specialized Tools: As noted earlier, a robot can handle tools and approaches humans can’t. For example, using a heavier grinding disk or maintaining an optimal high pressure that a human would find exhausting. This can result in faster material removal and new capabilities. A robot might also integrate with measurement sensors to ensure a precise finish that a human couldn’t easily replicate. So, sometimes automation can enhance the process beyond human limits, improving the finished product or process speed (like the example of using a 24-inch grinding media ).
-
Shorter Training and Skill Dependencies: Training a new manual polisher to a high skill level can take months or years, and even then there’s individual variability. Training a robot (or rather, programming it) is a one-time effort; once done, anyone with basic training can operate the cell. This flattens the skill curve – you’re no longer dependent on a few highly skilled individuals for quality results . This also means when experienced workers retire, their “knowledge” in a way remains captured in the robotic program. Furthermore, if you need to increase production, you can add another robot cell in parallel and replicate the program, rather than trying to find equally skilled new workers.
-
Potential Cost Savings on Consumables: This one is interesting – though robots might use abrasives at a steady rate, their consistency can actually extend abrasive life and reduce consumption. As mentioned, in manual work, misuse of abrasives (too much or too little force) can shorten their life. Robots hit the sweet spot every time, meaning you get maximum usage from each belt or wheel . Also, process optimization might reduce the number of abrasive grits needed (maybe a robot can achieve the finish in fewer steps than a human who might do extra passes just to be sure). Over time, that can marginally reduce consumable costs.
-
Better Integration and Automation of Entire Process: A robot finishing cell can be integrated into a production line with material handling, etc. This means less WIP (work-in-progress) sitting around. For example, parts can come off a machining center straight into a robotic deburring cell, then to assembly – without piles of parts waiting for a batch manual deburring operation. This improves overall factory efficiency and throughput time.
-
Competitive Advantage and ROI: All the above advantages roll into a competitive edge – higher quality products, produced faster and potentially at lower cost, and a safer workplace (which can help with employee morale and retention). When customers see consistency and flawless finishes, it enhances brand reputation. From an ROI perspective (which we’ll calculate next), these benefits typically translate into a payback period that management finds attractive (often 1–2 years for many projects depending on local labor costs, etc.).
In summary, robots in surface finishing improve quality, speed, and safety while lowering long-term costs. This combination of benefits is why many companies that adopt one finishing robot often end up automating additional finishing tasks once they see the positive results. It transforms finishing from a craft that’s hard to manage into a controlled process step in modern manufacturing.
How do robotic systems improve product quality and consistency?
Robotic finishing systems improve quality and consistency through precise control and repeatability. Some specific ways they achieve this include:
-
Elimination of Human Variability: Humans, even experts, have slight variations in how they perform tasks. Different workers may produce slightly different finishes; even the same worker can be inconsistent over time (due to fatigue or distraction). Robots have none of this variability – they execute the exact same programmed motions and forces on every cycle. This means each part sees the same treatment. For instance, if a robot is polishing a series of aluminum panels, each panel will get identical pressure, speed, and coverage, resulting in uniform surface roughness and appearance across the whole batch . This uniformity is difficult to achieve manually especially in high volumes.
-
Precise Control of Process Parameters: Robots can maintain optimal angles, speeds, and forces according to the process plan. If the best practice for grinding a part is at a 7° tool angle with 5 kg of force and a speed of 3000 RPM, the robot will stick to those exactly. Humans might deviate (maybe tilt the grinder more on corners, press harder when in a hurry, etc.). By sticking to the ideal parameters, robots avoid issues like over-grinding or under-polishing. This yields quality improvements like better surface integrity (no gouges, fewer residual stresses) and better cosmetic outcomes (no “over-polished” shiny spots or untouched areas).
-
Consistent Contact and Coverage: Through either meticulous programming or use of compliance devices, robots ensure the tool maintains consistent contact with the workpiece. This is crucial for quality. For example, when polishing, consistent contact ensures an even gloss. If a human accidentally lifts a buffer slightly in one area, that spot might end up duller – robots won’t do that. Similarly, for deburring, a robot can ensure every edge is hit at the same feed rate and orientation, so all edges are uniformly deburred (preventing a scenario where one edge still has a burr and another is overly chamfered).
-
Reduction of Defects and Scrap: With consistency comes fewer defects. Robots don’t get impatient and skip a step. They also don’t accidentally damage parts by slipping. This leads to a reduction in scrap parts that fail quality inspection due to finishing errors. As noted earlier, in manual finishing, especially towards the end of a long shift, mistakes or lapses can happen – a slight slip of a grinder might ruin an entire part. Robotic finishing, by contrast, has a very low defect rate once the process is validated. In industries like automotive, this means fewer rejections and rework. Over time, the cost savings from reduced scrap can be substantial.
-
Better Surface Integrity: Quality isn’t just about looks; it’s also about the integrity of the part. In grinding operations, excessive heat or uneven material removal can introduce stresses or heat-affected zones that reduce part life. Robots can be programmed to use optimal passes that avoid overheating (and can even incorporate dwell or coolant sprays as needed). The result is a part that meets not only the dimensional spec but also has no micro-cracks or warping from inconsistent manual work. A study might find that robot-ground parts have improved fatigue life because each part was identically processed with controlled force (no random excessive grinding that could introduce grinding burns, etc.).
-
Smoother Finishes and Closer Tolerances: In precision finishing, robots can achieve extremely smooth finishes (low Ra values) because they can make many small, controlled passes that a person might not have the patience for. Also, they can integrate measuring devices – for example, some robotic polishers include a surface roughness tester that can quickly check if the finish is at spec, and if not, the robot can continue polishing a bit more. This closed-loop capability is something impossible in manual operations. Ultimately, robots can often meet tighter surface requirements and more consistent dimensional tolerances on edges/corners than manual finishing would.
-
Minimized Need for Quality Checks: Since the process is consistent, manufacturers often find they can reduce the frequency of in-depth inspections. Of course, initial and periodic checks are still done, but if a robot is known to produce every part identically, you might switch from checking every piece to checking one in ten, for example, without compromising quality assurance. This speeds up overall production and confidence in the process.
-
Real-time Monitoring: Some robotic systems have sensors that monitor the process and can adjust to maintain quality. For instance, if the robot senses a slight increase in force due to tool wear, it might adjust its path or feed rate to maintain the desired effect. This is like an automatic quality assurance built in – ensuring consistency mid-process. Humans typically don’t have that level of feedback (apart from their own tactile feel, which isn’t as quantifiable).
To put it succinctly, robotic systems improve quality by turning what was once an “art” into a science – controlled, repeatable, and measurable. This results in consistent outputs that meet quality standards with little variation. In fact, many companies note that after deploying robotic finishing, their customer complaints or warranty issues related to surface finish drop dramatically, because the variation is gone. It’s not uncommon to see a scenario where previously, 5% of parts might need re-polishing or touch-up due to inspector rejection, and after automation, that goes to near 0%.
How can we measure the return on investment (ROI) for a robotic surface finishing system?
Measuring ROI for a robotic system involves comparing the costs of the system to the financial benefits it provides over time. The basic formula is:
ROI = (Annual Benefit or Savings) / (Initial Investment Cost), often expressed as a payback period (time to recover the investment) or as a percentage return.
To break it down:
Costs (Initial Investment): Include the robot and controller, end-of-arm tools, safety enclosure, integration engineering, installation, training, and any auxiliary equipment (dust collectors, fixtures, etc.). For example, let’s say a robotic polishing cell costs $250,000 all-in.
Benefits/Savings: These come from various sources:
-
Labor Savings: The most direct one. Calculate how many labor hours (and associated cost) the robot replaces. For instance, if you currently have 3 workers doing polishing at $20/hour each, that’s $60/hour labor. In a year (~2000 working hours), that’s $120,000 labor cost. If the robot can do the work of those 3, you save most of that $120k annually (maybe subtract some oversight labor for a technician).
-
Increased Throughput/Capacity: If the robot allows you to produce more units in the same time, there’s a revenue gain or opportunity gain. For example, if you can now finish 30% more parts per week thanks to the robot, you can take on more orders or avoid overtime. This one might be calculated as additional profit from extra sales or avoided cost of running a second shift. Sometimes it’s hard to quantify unless you are demand-limited.
-
Reduced Scrap and Rework: Put a dollar value on scrap reduction. If previously, 5 out of 100 parts had to be reworked or scrapped due to finishing errors, and each part is worth $X, you save 5*X per 100 parts with the robot (assuming it virtually eliminates scrap). For instance, if X is $50, that’s $250 saved per 100, which adds up based on volume.
-
Consumable Savings: If any, calculate difference in abrasive consumption or tooling life. E.g., maybe you spent $10k/year on abrasives manually and now $8k/year with the robot due to efficient use, saving $2k.
-
Lower Injury/Health Costs: This is harder to quantify but can be significant – fewer injury claims, less sick leave due to chronic issues, etc. Some companies factor this in if they have data (like average compensation claims or lost work days in finishing departments).
-
Quality Improvements: Improved quality can mean fewer warranty claims or higher customer satisfaction (leading to sustained business). Quantifying this is tricky, but if there is known cost associated with poor finishes (like $ per defect or recall cost), you could include potential reduction.
So, to calculate ROI, you’d sum up all annual savings. For example:
-
Labor: $100k/year saved (after repurposing or not needing certain manual positions).
-
Scrap/rework: $10k/year saved.
-
Others: $? maybe $5k in consumables, $5k in reduced overtime, etc.
Total annual benefit: say $120k.
Initial cost: $250k.
Payback = $250k / $120k ≈ 2.1 years. This means roughly a 2.1-year payback period, or about a 47% ROI per year (since 120k is ~47% of 250k).
Many companies target payback within 2 years for automation projects. A figure around 18 months (1.5 years) is very attractive. In fact, the Flexmill article on steel fabrication robots suggests a typical payback time of ~18 months for finishing robots in that context , which aligns with these kinds of numbers.
It’s important to also consider utilization: The ROI assumes you have enough work for the robot. If your production is intermittent and the robot sits idle often, the savings are less. So ROI is best calculated at expected utilization (like 80% uptime on one shift, or whatever is realistic).
Documentation for ROI: To support ROI, you might collect baseline data from the manual process (labor hours spent finishing per part, scrap rate, etc.) and then project or pilot test the robot to get comparative data.
Intangible or Hard-to-Quantify Benefits: Sometimes ROI analyses will also acknowledge the intangible benefits (safety, reduced reliance on skilled labor, ability to scale up production easily) even if they don’t assign a direct dollar value. These can tip the scales if the pure dollars are borderline.
Finally, after deploying, you can measure actual performance vs expected. For example, track how many parts per hour the robot is finishing, how often abrasives are changed, etc., and adjust the ROI calculation. If, say, the robot did 10% more parts than expected, the payback may be even faster.
In summary, measuring ROI involves identifying all areas of cost reduction and productivity gain from the robot, summing those up annually, and comparing to the one-time investment (and any difference in ongoing costs). Many have found that robotic finishing systems pay for themselves relatively quickly – often in 1 to 3 years – thanks to the significant labor and efficiency improvements they bring. Beyond that point, the continued annual savings directly contribute to the company’s bottom line.
How quickly can a robotic surface finishing system pay for itself?
The payback period for a robotic finishing system can vary, but as discussed, it’s commonly on the order of 1 to 3 years in many cases. A well-chosen application with enough volume and labor replacement can be on the shorter end of that range. Real-world examples and reports give a sense:
-
Approximately 18 Months: Many integrators and case studies cite 1.5 years as a typical payback for a single-shift operation where a robot replaces a couple of workers. This aligns with the earlier calculation where ~$120k/year savings on a $250k investment gave ~2.1 years – if savings were a bit higher or costs a bit lower, 18 months is feasible .
-
As Low as 12 Months (1 Year): In some scenarios with high labor costs or multi-shift operations, payback can be even faster. For instance, if you run the robot in two shifts (effectively doubling the labor it replaces compared to one shift), you might save $200k+ a year on a $250k system – giving near 1.2 year payback. There are cases where government incentives or tax benefits for automation also effectively reduce the investment cost, making payback in ~1 year possible.
-
Around 2-3 Years: More conservative or lower utilization cases might see 2+ years. If an operation is only on demand or the robot is not fully loaded with work, it can stretch out. Even at 3 years, though, that’s typically acceptable for capital investment – since the robot will likely run for 10+ years, meaning many years of net savings after breakeven.
-
Factors that Affect Payback Speed: Labor cost is number one – in regions with higher wages, ROI is faster. Volume of work is second – consistent high volume = faster payback. Also, the complexity of the system (a very complex custom system might cost more, lengthening payback unless it also replaces more labor). Conversely, a relatively low-cost cobot cell might pay off quickly even if it only replaces one person, because the investment was small.
-
Example: Suppose a company spends $300k on a finishing robot that replaces 3 workers ($50k each fully burdened cost, so $150k/year) and also eliminates $20k/year of scrap. Total savings $170k/year. Payback ≈ $300k/$170k = 1.76 years. After 1.76 years, the system has essentially paid for itself; each subsequent year that $170k is money that would’ve been expense but now is saved – effectively profit or available for other uses.
-
Beyond Payback – ROI as profit: After payback, you could say the ROI is how much the system yields as savings annually relative to its cost. In the above example, after 1.76 years, the $300k is recovered, and each year gives $170k benefit, so that’s about 57% of the initial cost per year. Over a 10-year life, that’s $1.7 million saved from a $300k spend – over 5x return.
It’s also good to note that sometimes companies compute ROI including things like opportunity cost – e.g., “with the robot, we avoided having to outsource some work or avoided building an extra facility, etc.” Those big-picture considerations can make payback effectively even faster in a strategic sense.
According to one insight: modern sanding and polishing systems often advertise improved throughput and quick ROI, with one source noting that a finishing robot can pay for itself in just over a year when productivity and quality gains are factored . Kingstone Robotics’ own marketing might mention that their solutions have short ROIs due to the combination of labor, quality, and safety benefits – which appeals to manufacturers who need to justify the capital expense.
In summary, while it depends on specifics, a robot finishing system typically pays for itself in a matter of months to a few years, not decades. Many managers find that the investment is recouped well within the robot’s usable life, making it a financially sound decision in addition to the non-financial benefits.
How does robotic automation in finishing address labor shortages or skill gaps?
The manufacturing industry in many regions is experiencing a shortage of skilled labor, especially for physically demanding and craft-intensive jobs like welding, grinding, and polishing. Robotic automation is a crucial solution to this problem in several ways:
-
Reduces Dependence on Skilled Artisans: Finishing processes often relied on veteran workers with years of experience to achieve top quality. As these experts retire, companies struggle to replace them – younger workers are less inclined to take up these strenuous trades. By automating, the knowledge is transferred to the machine. The robot’s program encapsulates the technique that an expert would use. This means you don’t need to find a 20-year polishing veteran for consistent results – the robot can do it with an operator who might just have a few weeks of training on operating the cell. Essentially, robots help bridge the skill gap by performing the high-skill aspects of the work.
-
Attracts a New Generation of Workers: Operating and supervising robots is generally seen as more modern and attractive than swinging a grinder all day. Companies find that younger workers are more interested in learning robotics and automation – it’s a high-tech skill that is in demand. So instead of trying to hire for a grinder position (which might get few takers), they can hire/train someone to be a robot technician or operator, which is a more appealing career path. This helps alleviate labor shortages because the talent pool for tech roles is larger than for heavy manual labor roles.
-
Fills Labor Gaps When Demand Surges: If you get a sudden increase in orders, finding additional temporary workers skilled in finishing is hard. A robot can often be ramped up (e.g., adding a second shift automated or increasing its utilization) to meet demand without the hiring scramble. It provides flexibility – e.g., running lights-out overnight to effectively add capacity that you would never find night-shift workers for. As one automation manager put it, robots are like an available workforce that you can deploy as needed to cover these gaps.
-
Works in Unpopular Conditions: Many labor shortages are because workers simply don’t want to do certain jobs anymore, especially in regions with better employment alternatives. Grinding in a noisy, dusty room wearing a respirator is not a popular job when other cleaner jobs are available. By having robots do those tasks, companies can still get the work done despite the fact that few people are willing to do it. In other words, robots ensure production continues even if labor market conditions are tight.
-
Upskilling Existing Workforce: Instead of hiring new, you can often retrain existing manual workers to oversee robots. This is a double win: you keep their domain knowledge (they know how a part should look when it’s properly finished) and you give them a less back-breaking role. Many companies find their older or injured workers, who can’t physically grind all day anymore, can transition to programming or monitoring the robot. This retains valuable employees and knowledge in a capacity where they can still contribute without the physical strain. It also alleviates the need to find new hires in a tight market.
-
Consistency Mitigates Skilled Shortage Effects: When labor is short, you might end up hiring less-skilled workers out of necessity, which can degrade quality or slow production. Robots mitigate this because once programmed, the result doesn’t depend on the individual operator’s craftsmanship. So even if your crew is green, the robot ensures output remains at high quality. The role of the human shifts to loading/unloading and checking, which is easier to train for.
-
Global Strategy: Some companies with multiple facilities use automation to reduce reliance on local labor markets. If one plant struggles to find polishers, they might implement robots there. In effect, automation can be a strategy to make production less sensitive to local labor supply issues. This is particularly relevant for countries or regions with aging workforces or where younger workers are not entering trades. Robotics provides a longer-term stable solution less tied to demographic shifts.
As evidence of this effect, industry surveys often note that the top reason for automating (aside from increasing productivity) has become “lack of available labor.” For finishing specifically, 3M’s Scott Barnett noted that adoption of robotic sanding and grinding has “really taken off in the past 3 years: our customers just can’t find workers.” . This underlines how directly robots are filling in for a dwindling labor pool.
In summary, robotic finishing helps companies overcome labor shortages by reducing the number of people needed, making the jobs more attractive, and maintaining output and quality despite the lack of skilled craftsmen. It turns a potentially crippling human resource problem into a manageable technical challenge, which many businesses find far more feasible to solve.
Do robotic finishing systems reduce scrap and rework, and how?
Yes, one of the major benefits of robotic finishing is a significant reduction in scrap and rework due to improved consistency and precision. Here’s how and why that happens:
-
Fewer Mistakes: Human error is a big cause of scrapped parts in manual finishing. A slip of a grinder can gouge a surface beyond repair; excessive polishing might remove too much material or round a critical edge that needs to stay sharp; missing a burr might cause a part to fail inspection. Robots, once properly programmed and validated, don’t make these mistakes. They follow the recipe exactly, every time. So the kind of “oops” moments that lead to scrapping a part are largely eliminated. This directly cuts down scrap rate. If historically, for every 100 parts, 2 were scrapped due to finishing errors, you might see that drop to near zero with a robot.
-
Uniform Quality Reduces Rejections: In some production, parts that are technically within dimensions might still be rejected for cosmetic reasons (surface finish not meeting spec or inconsistent appearance). By producing a uniform finish, robots ensure all parts pass that cosmetic criterion. For example, if a batch of handset covers were polished by different people, you might have 10 out of 100 that a QC person pulls aside for rework because they don’t “look” as good. With a robot, since they all look identical, QC is likely to accept the whole batch. This reduces the rework loop where parts get sent back to be touched up.
-
Controlled Material Removal: Robots can be programmed to remove only what’s necessary. They can also be more precise about how much material they take off (through path control and consistent force). This avoids the issue of over-thinning or dimensionally altering parts. Manual grinding can sometimes inadvertently remove too much material, making a part undersize – scrap. A robot can be set to stop exactly at the desired dimension. Think of deburring: a robot can take off just the burr; a zealous human might accidentally chamfer an edge too much, causing assembly issues. So, scrap due to dimension or geometry changes goes down.
-
No Missed Operations: In a complex part with many features to finish, a human might occasionally miss a spot or an edge (especially if tired or if the part is complex). That part then fails inspection later, requiring rework or scrap if it’s not caught in time. Robots, however, will systematically cover all programmed areas. If set up right, they won’t accidentally omit a hole or edge. This comprehensive coverage ensures no “unfinished” features slip through.
-
Consistent Interaction with Post-Processes: If finishing is a prep for another process (like painting or plating), consistency helps reduce rejects in those subsequent steps. For example, uniform sanding of a part leads to uniform paint adhesion; if a human under-sanded one area, paint might peel there leading to rework. Robots prevent such scenarios, indirectly cutting scrap from later process failures.
-
Reduced Handling Damage: When humans manually handle parts a lot (especially heavy or awkward ones), there’s risk of dropping or bumping them, causing damage. In an automated cell, parts might be fixtured and moved less by hand, reducing such incidental scrap.
-
Case in Point: A manual finishing department might have a scrap barrel where all the “oops” parts go. After automation, companies often report that scrap barrel is far less populated. A specific example: in a fabrication shop, after installing a grinding robot for weld cleanup, they saw scrap due to grinding defects virtually disappear, whereas before a couple parts a week might be scrapped for grind-through or distortion from inconsistent grinding heat. Similarly, a polishing line for appliance panels might see rework drop from 10% of parts to near 0 because the robot achieved an even finish that always passed QA.
-
Minimized Rework Loops: Rework essentially means doing the process twice (or more) on some parts. It’s a hidden productivity killer and cost. With robotics, since parts tend to come out right the first time, there’s minimal rework. This frees up capacity (the time that would have been used reworking can now be used to process new parts) and ensures on-time delivery (no delays from having to redo parts).
One of Kingstone’s articles highlighted improved product uniformity and minimized scrap as key benefits of robotic polishing . It noted that even skilled technicians can cause variable finishes when fatigued, whereas automation yields consistent quality, reducing defects and waste.
So, yes, robotic systems do reduce scrap and rework. Many adopters of robotic finishing have found that the investment partially paid for itself just in saving material that used to get scrapped – aside from the other savings. It also provides peace of mind: knowing that you won’t suddenly have to tell a customer “we lost 5% of the batch due to finishing issues” is a big relief in production management.
Can robotic finishing systems run unattended or lights-out to improve efficiency?
Absolutely, yes. One of the advantages of robotic systems is that they can operate unattended for extended periods (often referred to as “lights-out” manufacturing). For surface finishing, leveraging unattended operation can significantly boost overall equipment efficiency and output. Here’s how and what to consider:
-
Lights-Out Operation: A well-designed robotic finishing cell can run during off-shifts (overnight or weekends) without direct human supervision. During this time, the robot can continue processing parts, effectively increasing your production hours beyond the normal workday. For example, if your normal staffed operation is 8 hours, but you let the robot run for an additional 4 hours unattended in the evening, that’s a 50% increase in output for relatively little extra cost (mostly just power and consumables).
-
Requirements for Unattended Running: To run lights-out, you need to ensure a stable process and enough raw material/parts for the robot to work on. This often means incorporating a parts feeder or magazine that can supply parts to the robot and a place to put finished parts. In some cases, a simple conveyor with a buffer of parts can suffice, or a turntable where one side is loaded while the other is being processed (the robot can then switch). Some advanced cells use automated guided vehicles (AGVs) or conveyors to bring new parts in and take finished parts out. But even without those, an operator could load up, say, 20 parts in fixtures, start the robot, and go home, and the robot will finish all 20 by morning.
-
Sensors and Safety: For true unattended operation, the system should be robust in detecting any anomalies. For instance, if a part were to come loose or a tool were to break, the system should detect it and ideally stop safely or move to a safe state. This might involve torque sensors noticing an unexpected spike (tool break) or vision sensors checking that a part is present before processing (so it doesn’t grind air for hours if a part fell). Most modern systems can be equipped with such interlocks. Fire safety is another consideration if grinding sparks are present – typically, lights-out grinding would avoid operations that produce lots of sparks unless fire suppression is in place or it’s in a controlled, fireproof cell.
-
Consumable Management: To run unattended, consumables like abrasive belts or polishing compound need to last the duration or be automatically replenished. This might mean using higher capacity belts or having an auto-belt changer (some cells can spool in a fresh section of belt when one section wears out). For buffing, automated compound applicators can keep the wheel “charged.” You design the cycle so that it can go through X parts without running out of abrasive or requiring a change. Perhaps you might limit lights-out operation to a number of parts that you know one set of media can handle.
-
Maintenance and Downtime: Running lights-out will increase the total hours on the robot and tools, so maintenance schedules need to account for that. However, since lights-out typically happens when nobody else is around, it’s efficient use of time that would otherwise be wasted (factory idle at night). You effectively get more from your capital equipment. A well-known benefit is that it enables 24/7 production without 24/7 staffing .
-
Real Examples: Many metal fabrication shops run robotic deburring machines overnight. For instance, a laser cutting operation might cut parts all day, then at night a robot deburrs all the day’s output so in the morning all parts are clean and ready for the next step. Another scenario: a tool manufacturer might set up a robot to polish hundreds of small parts in a batch; they start it in the evening and by morning all parts are polished, far exceeding what one shift could do manually.
-
Monitoring: Even lights-out, some companies use remote monitoring – the robot controller can send alerts if it stops or encounters an error, possibly even notifying someone’s phone or a central system. This way, if something does go wrong an hour into a lights-out shift, someone can be alerted to come in or address it (depending on criticality). In the best case, nothing happens and it just completes the work.
-
Human-Free Shifts and Labor Efficiency: Lights-out doesn’t just increase output; it dramatically improves labor efficiency. You might have a single operator set up the cell and then one operator in the morning to unload and check parts, but essentially no labor during the production time at night. This lowers per-unit labor cost even further. In places where labor regulations or costs for night shifts are high, having robots do the night work is a great workaround.
In summary, robotic finishing systems are very conducive to unattended operation because once the process is stable, it doesn’t usually require human intervention. By running lights-out, manufacturers effectively extend their capacity and get more value from the investment, which improves ROI. It’s like having a second (or third) shift’s worth of output without the proportional increase in labor costs. Many who implement finishing robots do take advantage of this, citing it as a key benefit – the ability to meet production targets without adding overtime or additional shifts, simply by letting the robot work after hours.
5. Safety and Quality Control
Safety and quality control are paramount considerations when introducing robotic systems into finishing operations. In this final section, we address how robotic finishing improves worker safety, what safety measures are necessary for these cells, and how quality control is maintained or even enhanced with automation. We’ll cover risk mitigation (dust, accidents), operator training, and the tools to ensure finished parts meet specifications every time.
What safety risks exist in manual polishing and grinding, and how do robots make the process safer?
Manual polishing and grinding pose several well-known safety and health hazards to workers:
-
Physical Injuries: Operators risk acute injuries such as cuts, amputations, or lacerations from fast-spinning wheels and tools. A grinder kickback or a shattered abrasive wheel can cause severe harm. Hand-held grinding tools also produce sparks and flying debris that can hit the eyes or skin. There’s also the chance of accidents like entanglement with buffing wheels or getting caught between a part and a fixed grinder.
-
Repetitive Strain and Musculoskeletal Disorders: As mentioned earlier, manual finishing tasks often require awkward postures, repetitive motions, and exerting force for extended periods . Workers polishing or grinding all day commonly suffer from back pain, shoulder injuries, tennis elbow, carpal tunnel syndrome, etc. These injuries can develop over time (cumulative trauma) and lead to chronic pain or inability to work.
-
Hand-Arm Vibration Syndrome (HAVS): Holding vibrating tools (like grinders) for hours can damage nerves and blood vessels in the hands and arms (leading to numbness, blanching of fingers, reduced grip strength). This is a known occupational disease among grinders.
-
Noise-Induced Hearing Loss: Grinding, sanding, and polishing equipment are loud. Prolonged exposure to these noise levels (often >90 dB) can cause permanent hearing loss if proper hearing protection is not worn consistently.
-
Dust and Fume Inhalation: Grinding and polishing generate fine particulate matter – metal dust, abrasive particles, and sometimes hazardous compounds (e.g., coatings being sanded off). If polishing with compounds, there might be fine mist of chemical-laden particles. Inhaling these can cause respiratory issues, from short-term irritation to long-term conditions like silicosis (if silica-based abrasives) or occupational asthma. Some materials (e.g., beryllium, found in certain alloys) can be downright toxic when inhaled even in small quantities. Also, if any plating or chemical residues are on parts, those could become airborne. Many manual finishers develop chronic lung problems.
-
Eye Injuries: Without perfect use of goggles, the chance of foreign bodies in the eye is high. Even a tiny abrasive grain can cause serious eye damage. Sparks can also burn the retina.
-
Burns: In grinding, the workpiece can get very hot. Workers can suffer burns if they touch metal that’s been freshly ground or by stray sparks. Also, in buffing, friction can heat parts.
-
Fatigue and Human Error Leading to Accidents: A tired worker is more likely to make mistakes – like losing grip of a part being buffed (which then flies off), or tripping, or placing a hand too close to a moving wheel. Long hours in PPE (personal protective equipment) also cause fatigue, which can reduce attentiveness to safety.
How robots improve safety:
Robots directly remove the worker from the immediate vicinity of these hazards. The worker becomes a programmer or an overseer, usually separated by a safety barrier from the process.
-
Eliminating Human Exposure: Since the robot is doing the grinding/polishing, the operator isn’t holding a tool or the part. They are typically outside a safety fence or at a safe distance during operation. This means no direct exposure to spinning wheels, no risk of kickback injuries, and no sparks hitting skin . Essentially, the robot absorbs the dangerous aspects – if a wheel breaks, it’s inside a guarded cell so fragments don’t hit a person. If a part slips from the gripper, it’s contained.
-
Reduced Ergonomic Strain: The worker no longer has to do repetitive motions or exert force; the robot handles that. Over time, this can dramatically cut down on repetitive strain injuries among the workforce. Instead of a physically broken-down grinder after 10 years, you have a technician who can work comfortably for a longer career. Kingstone’s safety piece emphasized how robotic arms replicate the motion without the fatigue, preventing musculoskeletal issues .
-
Isolation of Dust and Noise: Robotic cells can be enclosed with sound-dampening and dust extraction. By enclosing the process, noise is contained (reducing what workers are exposed to outside the cell) and dust is captured at the source via vacuum systems. Workers aren’t breathing the dust or enduring the same decibel levels, drastically improving their work environment . Some cells have automatic doors that only open when the robot is stopped, keeping dust in while running. Essentially, robots allow you to engineer controls for hazards (enclosure, ventilation) that are harder to do when humans must physically be at the spot of work.
-
Safety Interlocks and Controlled Motions: Industrial robots come with safety-rated control that can limit speed or stop if something unexpected is detected (especially cobots or with external sensors). While the robot itself is powerful, a properly designed cell prevents it from harming humans – the environment is predictable and engineered. This contrasts with manual operations where the environment is variable and reliant on each worker’s vigilance. Robots don’t get “distracted” or “rushed” in a way that would compromise safety.
-
Fewer Human Errors: Automation reduces the chance of accidents caused by human lapses. A robot won’t forget to wear PPE; it won’t get tired and slip. By reducing reliance on perfect human behavior for safety, the overall risk goes down.
-
Fire and Explosion Safety: Grinding certain metals (aluminum, titanium) can create flammable dust, and buffing compounds can also be flammable. With robots, it’s easier to implement measures like extraction and isolated spark areas to manage these risks. If doing lights-out, one can install fire detection/suppression. While these could also be done in manual scenarios, having no person in the cell means you can design it purely around process safety.
-
Regulatory Compliance: Using robotics can help meet or exceed workplace safety regulations (like OSHA limits on noise, dust, vibration exposure). For instance, if noise at the source is 100 dB but with an enclosure it’s 80 dB at the operator station, you might no longer exceed legal limits, avoiding the need for extensive hearing conservation programs.
-
Case evidence: The article “Safer, Smarter, Stronger: How Robotic Polishing Protects Workers…” specifically details improvements such as reduction of strain, controlling dust and toxic exposure, preventing accidents from tool operation, removing humans from high-risk environments (heat, noise, vibration), etc. . These are exactly the transformations we see.
In conclusion, robots make polishing/grinding safer primarily by removing the worker from the direct line of fire of hazards. This leads to a dramatic drop in injury rates, healthier workers, and a safer workplace. It converts safety management from trying to protect a person who’s in a dangerous situation to designing the dangerous situation to operate without a person present – which is inherently safer.
What safety measures and features should a robotic finishing cell have?
While robotic cells improve safety, it’s crucial to implement proper safety measures. A comprehensive robotic finishing cell should include:
-
Physical Safety Barriers: Typically, a safety fence or enclosure surrounds the robot and its workspace. This prevents people from getting too close during operation. The barrier should be sturdy enough to stop ejected parts or broken tool fragments. Many cells use steel mesh fencing or solid panels for this. If the cell is enclosed for dust/noise, those walls often double as the safety barrier.
-
Interlocked Access Doors: Any door or gate in the fencing should have an interlock switch connected to the robot controller. If someone opens a door while the robot is running, the interlock triggers an emergency stop of the robot and tool. This ensures no one can inadvertently walk in on an active grinding process. Similarly, maintenance access panels are interlocked.
-
Emergency Stop (E-Stop) Buttons: There should be multiple e-stop buttons around the cell – at the operator station, on the robot controller, perhaps on the cell exterior. Hitting any e-stop immediately cuts power/movement to the robot and tools. Operators should be trained on their locations and use. Robots also often have built-in e-stop buttons on the teach pendant.
-
Safety Sensors (if needed): In some cells, especially if there are openings (like if parts are loaded via conveyor without a full fence), area scanners or light curtains can be used. For example, a light curtain at a part entry slot will stop the robot if a person tries to reach in through that slot. Area laser scanners can monitor a zone around the robot; if a human breaches a warning zone, the robot slows, and if they breach a stop zone, the robot stops. However, in grinding, a fully enclosed cell is more common due to debris containment.
-
Collision Detection and Limiting: Many modern robots have collision detection features – the controller monitors motor torques and will stop if a sudden spike indicates a collision (with an unforeseen object or person). Collaborative robots specifically are force-limited to avoid injuring a person if contact occurs. While you wouldn’t typically want anyone near a grinding cobot either, these features add a layer of safety for unexpected scenarios. Additionally, you can software-limit the robot’s reach to within its cell (safe zone limiting) so it cannot physically extend beyond certain points.
-
Spindle/Tool Safety Features: The finishing tools themselves might have guards (like a partial wheel guard on a grinder) or automatic shutoffs. For instance, if a belt snaps, a sensor could detect loss of tension and stop the motor. If a motor overheats or overcurrents, it should shut off to avoid fire. In buffing, overload sensors can detect if a part is grabbed by the wheel (though ideally fixtured parts avoid that).
-
Dust Collection and Fire Safety: As touched on, a good dust collection system is a safety feature because it removes flammable dust and airborne health hazards. The cell might have spark arrestors in the duct to prevent fires in dust filters. Some systems include heat or flame sensors in the cell that trigger CO2 or dry chemical fire suppression if grinding sparks were to ignite something (this is more common in unattended or particularly spark-heavy operations).
-
Noise Reduction: To protect anyone nearby and to comply with noise regs, the cell should ideally have sound-dampening panels or at least keep noise levels at the fence below limits. This might include lining the inside of an enclosure with sound absorbing material (taking care it’s also fire-resistant etc.).
-
Visual and Audible Warnings: The cell should have status lights (a stack light with green/yellow/red) indicating robot status (running, stopped, fault) so people know at a glance if it’s active. Audible alarms may sound before the robot starts (e.g., after closing a gate, an alarm beeps for a few seconds to warn it’s about to move). These alerts keep everyone aware of the robot’s state.
-
Operator Training and Procedures: A safety measure beyond hardware is ensuring only trained personnel operate or enter the cell. They should follow lockout-tagout (LOTO) procedures when performing maintenance – e.g., using the controller’s safety maintenance mode or physically locking the robot from restarting. Training should cover not reaching into the cell without disabling it, wearing appropriate PPE when interacting (like when changing an abrasive in the cell, still wear gloves etc., since edges could be sharp).
-
Floor Markings and Signs: Typically, floors around the cell are marked (yellow lines or hashed areas) to delineate safe approach zones. Signs on the cell warn of hazards: “Robot in operation – keep out”, “PPE required beyond this point” (if, for example, hearing protection needed near the cell), or specific material hazard signs if applicable.
-
Regular Safety Inspections: Built into the system maintenance should be checks of all safety devices. For example, periodically test that each e-stop indeed stops the robot, that interlocks work (you open a door, robot stops), that the light curtain triggers properly, etc. Also, inspect fences and barriers for any damage or gaps.
-
Standards Compliance: Ensure the cell design follows relevant robotic safety standards (like ISO 10218 / RIA R15.06 for industrial robots, which detail safety requirements). Compliance usually ensures all the above are addressed systematically. For grinding specifically, also consider standards for machines and dust (e.g., NFPA for combustible dust if relevant).
With these measures, a robotic finishing cell can be extremely safe – safer than many other types of equipment. Operators will not be exposed to hazards unless proper procedures are bypassed (which training and interlocks aim to prevent). It creates a controlled environment where the dangerous work happens in isolation.
Kingstone’s approach, for instance, emphasizes not only the intrinsic safety improvement by using robots, but also that their systems come with the necessary safeguards (fencing, sensors) to ensure risk is minimized . By aligning with evolving safety standards, a well-designed cell doesn’t just react to accidents – it prevents them proactively .
How is quality control handled in robotic finishing? How do we ensure each part meets specifications?
Quality control in robotic finishing is achieved through a combination of process validation, in-process monitoring, and post-process inspection. Ensuring each part meets spec involves several strategies:
-
Process Validation and Tuning: Before full production, the finishing process is validated. This means you run a series of parts with the robot, measure their surface finish (roughness, gloss, dimensions, etc.), and adjust the program until it consistently produces within spec. Once validated, the robot program (the combination of path, speed, force, abrasive selection, etc.) is essentially a recipe known to yield good parts. This initial QC step is crucial – it establishes the baseline quality. For example, you might polish 10 sample parts, measure their surface roughness (Ra), and confirm it’s at the desired 0.2 μm with minimal variation. You then lock in those parameters.
-
Consistent Execution: As discussed, the robot’s consistency is itself a quality assurance. By doing the same thing every time, it reduces the variation between parts. This intrinsic consistency means that if the first part after setup is good, the next hundred will be as well, assuming nothing drifts.
-
In-Process Monitoring: Some robotic cells incorporate sensors to monitor quality-related aspects on the fly:
-
Force Sensors: Ensure the robot is applying the correct force; if the force deviates (say a part is slightly misaligned and force drops), the system can compensate or flag an issue.
-
Torque/Current Monitoring: If a tool’s motor current goes up, it may indicate the tool is working harder (possibly due to a dull abrasive or a geometry mismatch), which could affect finish. The system might adjust speed or trigger a tool change.
-
Acoustic Emission Sensors: In grinding, these can detect the sound signature of good vs bad grinding – e.g., a fully ground surface vs chatter. They can be used to terminate a process when a certain threshold is achieved or detect anomalies.
-
Vision Systems: Some advanced cells use cameras or laser scanners to inspect the surface either during operation or immediately after. For example, a vision system could look at a polished surface for scratches or measure the sheen. Or a 3D scanner could check that a deburred edge has the proper radius and no remaining burr. If something is off, the system might automatically rework the part or alert an operator.
-
Automatic Gauging: In some cases, after finishing, the robot might present the part to a measuring device (like a roughness tester or a go/no-go gauge for an edge) as part of the cycle. This ensures each part is checked. For instance, a robot could quickly touch a surface profilometer to a polished metal disk to ensure Ra is within range, right after polishing it.
-
-
Post-Process Inspection: Even with high confidence in the robot, typically quality control will still do sampling inspection. However, the frequency can often be reduced. If previously every part was visually inspected for burrs, maybe now you inspect 1 in 10 because the robot is reliable. Critical parts might still be 100% inspected (possibly by an automated vision system or a QC person) – but they’ll find far fewer issues than in manual finishing. For example, an inspector checking robot-polished orthopedic implants might go through dozens of parts without finding any defects, whereas in manual, they might catch a tool mark or uneven area occasionally.
-
Feedback Loops: When QC (either automated or human) does catch something slightly off, adjustments can be made. Perhaps after a thousand parts, the abrasive wore faster than expected and the last few parts are just shy of spec. The solution might be to schedule abrasive changes sooner or add another pass in the program. This continuous improvement approach fine-tunes quality maintenance.
-
Documentation and Traceability: Each part processed by the robot could be tagged (physically or in a database) with the program used, time, etc. If later a quality issue arises, you can trace back and check if something changed. But in general, traceability is easier because the process is digital – you know exactly what was done via the program log. Also, if any in-process data are logged (forces, etc.), they could be used as quality records. For instance, if a particular part had a higher force reading in one area, you might flag it for extra inspection. This is a level of detail rarely available in manual processes.
-
Preventive Maintenance for Quality: Part of QC is ensuring the equipment and abrasives are kept in shape. As discussed in maintenance, regularly replacing tools before they degrade keeps quality from drifting. This is a planned approach – e.g., change polishing wheel every 100 parts even if it could maybe go 120, just to be safe and consistent. Robots allow very predictable scheduling of such maintenance because usage is consistent.
-
Calibration: Ensuring the robot and any sensors are calibrated on schedule means the programmed path and forces remain accurate, which is directly tied to quality outcomes (e.g., if the robot’s reference is off, it might leave a part of the surface less polished).
-
Standards Compliance: If surface finish is tied to standards (like a certain Ra or visual standard), you incorporate those into the robot’s validation. Perhaps using test coupons or witness samples polished alongside parts to verify quality.
To illustrate with an example: Suppose a robot is deburring gear shafts. Each shaft after deburring is automatically rolled under a camera that checks every keyway edge for remaining burrs (the camera is trained to see small reflective lines that indicate a burr). If a burr is found on one, the system triggers that part to be sent to a rework tray for further attention, while good parts go to good tray. Over time, maybe none go to rework because the robot consistently got them all – but the system is there as QC.
In many cases, after initial confidence is built, companies find they can trust the robotic process so much that QC steps can be minimized (which is a secondary cost saving). But prudent practice is to always keep some level of oversight. The difference is that oversight rarely finds issues, rather than being a critical catch-all as it often had to be in manual finishing.
In summary, quality control in robotic finishing is ensured by designing quality into the process (through consistency and monitoring) rather than inspecting quality after the fact. This often leads to the adage that with automation, “the process is the quality control.” Still, backup inspections and smart sensors provide the safety net so that each part leaving the cell meets specifications reliably.
Figure: Example of process integration and quality improvement in robotic finishing. The top timeline (orange) shows a traditional sequence with manual work + quality check steps after cutting, bending, and welding. The bottom timeline (green) shows an automated sequence where robotic finishing replaces manual work, thereby eliminating separate quality checks and saving time. Robots produce uniform quality that reduces the need for post-process inspection, streamlining the fabrication process .
What kind of training do staff need to operate and maintain a robotic finishing system safely and effectively?
Implementing a robotic finishing system does change the job functions of staff, and training is critical to ensure they can operate and maintain the system properly. Key training aspects include:
-
Robot Operation Training: Staff (like operators or technicians) should be trained on the robot controller and teach pendant. They need to know how to start and stop programs, select the right program for a given part, adjust simple parameters if allowed (like maybe speed overrides), and respond to common alarms or errors. Many integrators provide on-site training when installing the system, covering the basics of the robot’s user interface. The goal is that the daily operator can run the cell without constant expert help.
-
Safety Training: Workers must be trained on the safety features of the cell. This includes understanding the fencing and interlocks – e.g., never entering the cell unless the robot is in a safe state, using lockout procedures before maintenance, location of E-stops, etc. They should also be taught the why of these measures (like what could happen if someone bypasses a light curtain) to ensure compliance. Additionally, if any PPE is still required during certain interventions (like wearing cut-resistant gloves when changing abrasive belts), that should be ingrained.
-
Process-Specific Training: Since this is finishing, operators might need to have some understanding of the process outcomes. For instance, recognizing what a good finish vs a bad finish looks like, so they can inspect parts effectively. They should know how to measure surface finish if needed (with a profilometer) or at least how to visually assess and when to call for quality engineers. If minor adjustments are sometimes needed (say, tweaking the number of passes in a program if a tool is slightly worn), they should be instructed on how and when to do that, or whether to rather replace the tool.
-
Maintenance Training: Maintenance personnel (or the operators, if they’ll do daily maintenance) need training on keeping the cell running. This includes how to safely replace consumables (e.g., the steps to change a grinding disc – how to jog the robot to a change position, ensure it’s off, etc.), how to clean the dust collector or replace its filter, lubrication points on the robot, inspection of the tool for wear, etc. They should have a maintenance schedule and learn the tasks on it: for example, “every 50 hours, check belt tension on the sander attachment; every day, empty dust bin; every week, grease compliance unit” and so on.
-
Basic Programming and Adjustments: Depending on the workforce skill level, some staff might be trained in more advanced tasks like touching up the robot path or creating a new routine for a slightly different part. Even if programming is mostly for engineers or integrators, having at least one in-house person who can do program adjustments is very valuable. Training could involve an intensive course from the robot manufacturer or integrator focusing on programming for finishing processes. They should learn how to use any offline programming software if that’s part of your system.
-
Troubleshooting Training: What to do when something goes wrong – e.g., robot stops mid-cycle with an error. Trainees should learn to interpret common error codes (like if it says “Force limit exceeded – probably tool hung up”), how to safely enter the cell if needed to fix an issue (after e-stop and LOTO), and how to recover (resetting the system, repositioning the robot to restart, etc.). The integrator typically provides documentation of common faults and fixes (like “if part slips, do X”). This helps minimize downtime because staff can solve minor issues without waiting for external support.
-
Quality Assurance Training: If the staff’s role includes checking parts, they should be trained in the proper use of any quality measuring tools (surface roughness testers, gauges, etc.) and in the acceptance criteria of the finished parts. Essentially, although the robot does the work, the human must still verify it’s correct – training ensures they know what to look for.
-
Cross-training: Ideally multiple people should be trained so you have coverage for different shifts or in case one person is out. Cross-training operators and maintenance on each other’s basic tasks can also help (an operator who can do a quick belt change if maintenance is busy, for instance).
-
Continued Learning: Encourage staff to continue learning about the robot system. Robot and tool suppliers often have advanced courses. Keeping staff updated means they might come up with improvements or at least keep the system running at peak. It also enhances their job satisfaction as they become more skilled in robotics – transitioning from a manual grinder to a robot technician is a skill uplift that many appreciate.
-
Safety Culture Shift: Workers may need some mindset adjustment – some might have fear or distrust of robots initially. Training and demonstration of safety features can alleviate this. It’s important they view the robot as a collaborative tool, not a threatening replacement. Emphasizing how it makes their job safer and upskills them is helpful.
From Kingstone’s perspective, they and their integrator partners would typically spend time training the customer’s team during commissioning. They might provide user manuals and quick-reference guides (with pictures of the HMI, etc.). Ensuring the workforce is comfortable with the new system is a key factor in its success and in deriving all those benefits like improved safety and quality.
In summary, staff need to be trained in operating the system safely (understanding the tech and the safety aspects), maintaining it (keeping it in tune), and monitoring output quality. With proper training, even personnel without prior robot experience can effectively manage a robotic finishing cell, and this often leads to increased engagement – workers become proud of running a sophisticated piece of equipment and take ownership of its performance, which further boosts productivity and quality.
Conclusion
Robotic surface finishing – encompassing grinding, polishing, buffing, and deburring – represents a transformative upgrade to traditional finishing operations. By leveraging advanced robotics, sensors, and intelligent process control, manufacturers can achieve consistent high-quality finishes, improved throughput, and a safer work environment. From the technical fundamentals of force-controlled polishing to the strategic business benefits of ROI and labor optimization, robotic finishing systems have proven their value across industries, from automotive and aerospace to consumer goods and medical devices.
Kingstone Robotics, as a provider of automated surface treatment solutions, has witnessed firsthand how these systems elevate production: minimizing human hazards, ensuring every part meets strict specifications, and ultimately lowering costs through efficiency and reduced waste. When implemented thoughtfully – with the right equipment selection, worker training, and safety measures – a robotic finishing cell can become a cornerstone of manufacturing excellence, turning what was once an unpredictable, manual craft into a precise, reliable, and scalable process.
In the journey of adopting robotic surface finishing, understanding the core principles (technical and operational) and asking the right questions (like those answered above) is crucial. With that knowledge, companies can make informed decisions and fully harness the power of automation to shine (quite literally) in their respective markets.
References
-
Timesavers – What is deburring? (Website article). Defines deburring as removing burrs (unwanted sharp edges or protrusions) using abrasive tools .
-
FerRobotics – Grinding, sanding, polishing, deburring – Robotic surface treatment (Industry application page). Describes how active compliant tools maintain consistent force and quality, achieving 24/7 operation with higher productivity and solving “dirty, dull, dangerous” jobs .
-
Standard Bots – How to Master Your Grinding Robot: Choosing the Right One (Blog post, April 2025). Provides an overview of grinding robot basics, types, and factors like reach, payload, precision, software, and safety features to consider .
-
RIA / Automate.org – Industry Insights: Robots Embrace the Daily Grind of Abrasive Work (Article). Discusses the rise of robotic sanding/grinding due to labor shortages and complexity, noting productivity gains (e.g., 150% increase) and ability to use heavier media for better results .
-
Flexmill – How a Surface Finishing Robot Improves Your Steel Fabrication Process – Six Points (Blog article, 2021). Outlines quantifiable benefits of robotic grinding in steel fabrication, including 3-5x tool-on-contact time and typical payback of ~18 months . Also provides diagrams illustrating process time savings by eliminating manual steps .
-
PushCorp – Robotic Polishing Applications & Automation (Application note). Discusses how precise force and constant speed tooling improve finish consistency and abrasive life by 200-300% in robotic polishing, compared to manual processes .
-
HowToRobot – Polishing Robots: Automating the Finishing Process (Article, 2022). Notes that high-volume, standardized polishing tasks are ideal for robots, while highlighting that inconsistent parts or random defects require sensors (vision) for robots to handle effectively .
-
A3 – Best Practices in Robotic Grinding and Finishing (Blog, 2025). Recommends controlling force, using the right robot size, and keeping a clean station (vacuum dust) as keys to successful robotic finishing .
-
3M & Automate.org – Robotic Grinding and Finishing Conference insights (2020s). Carl Doeksen (3M) states that any polishing, grinding, or finishing application can be automated today, dispelling the myth that these processes must be done by a few skilled individuals .
-
Scott Barnett (3M) via Automate.org – Industry trend commentary. Notes that robotic use of abrasives has “taken off” because companies can’t find workers, underscoring labor shortage driving automation .